Country Birdhouse Spring Flowerpot Recipe
Here's a few pictures.
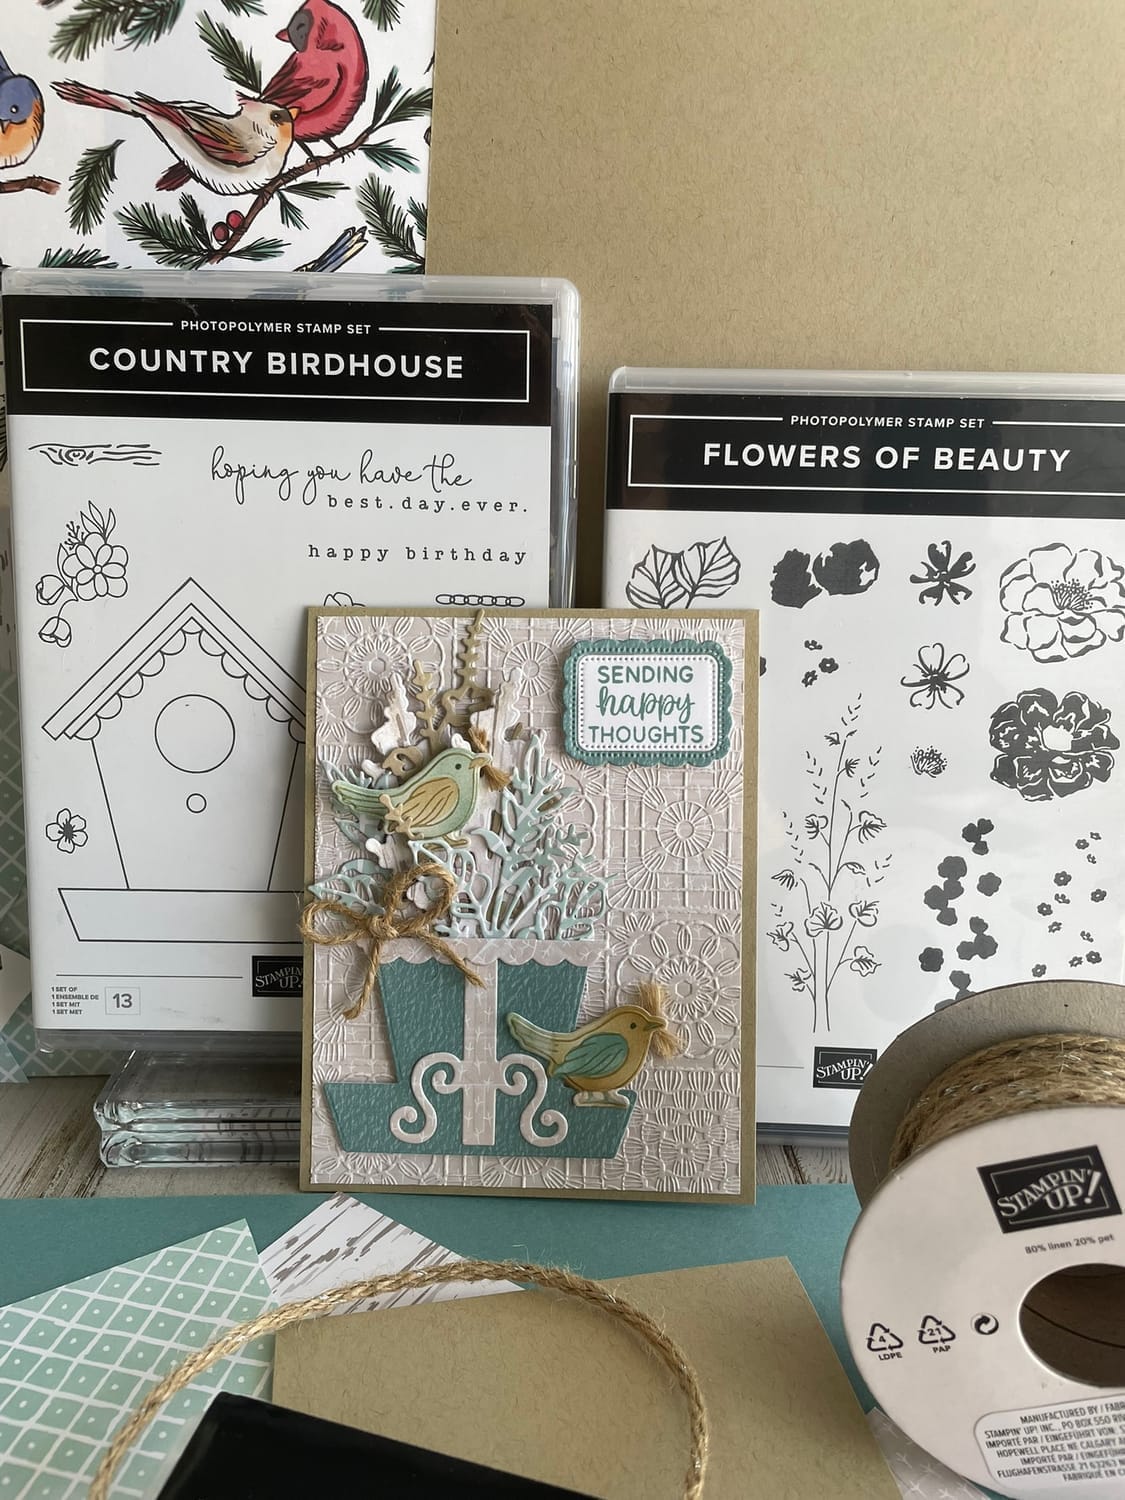
Products Used (Click the link to view/order)
Card Recipe
Country Birdhouse Spring Flowerpot Recipe
STAMPS, DIES, EMBOSSING FOLDERS
FLOWERS OF BEAUTY DIESCUTE CROCHET 3D EMBOSSING FOLDER
CARD BASE
CRUMB CAKE4 ¼ x 11 score @ 5 ½
CARDSTOCK
1) 4 x 5 ¼ (inside panel) *Use any sentiment of your choice. I used Artful Amaryllis for the ALL sentiments. Be creative and use what you have
1) 2 x 5 (stamping birds & sentiment for front)*Sentiment of your choice
CRUMB CAKE 2 ½ x 5 ½ (die cut longest greenery)
LOST LAGOON 3 ½ x 3 ½ (die cut birdhouse bottom portion, sentiment frame)
*Use any sentiment & die of your choice. I used Artful Amaryllis sentiment & Unbounded Love die cut scalloped edges.
INKS CLASSIC STAMPIN PADS
DSP
NESTS OF WINTER DESIGNER SERIES PAPER
1) 3 ½ x 5 ¼ (die cut 2 floral) White distressed wood
1) 3 ½ x 4 ½ (die cut 2 greenery pieces) Blue diamond pattern
1) 2 x 5 (die cut scalloped trim & Birdhouse stand) Light bird feet print
1) 4 x 5 ¼ (embossed with crocket folder) *also from
Light bird feet print)
FINISHING TOUCHES
Threaded twine for bow and bird’s beak nest material *Use ribbon or bakers twine
Stampin’ dimensionals, Wink of Stella
ASSEMBLY (LETS PUT THIS BEAUTIFUL CARD TOGETHER)
ASSEMBLY INSTRUCTIONS
FIRST
Cut card base
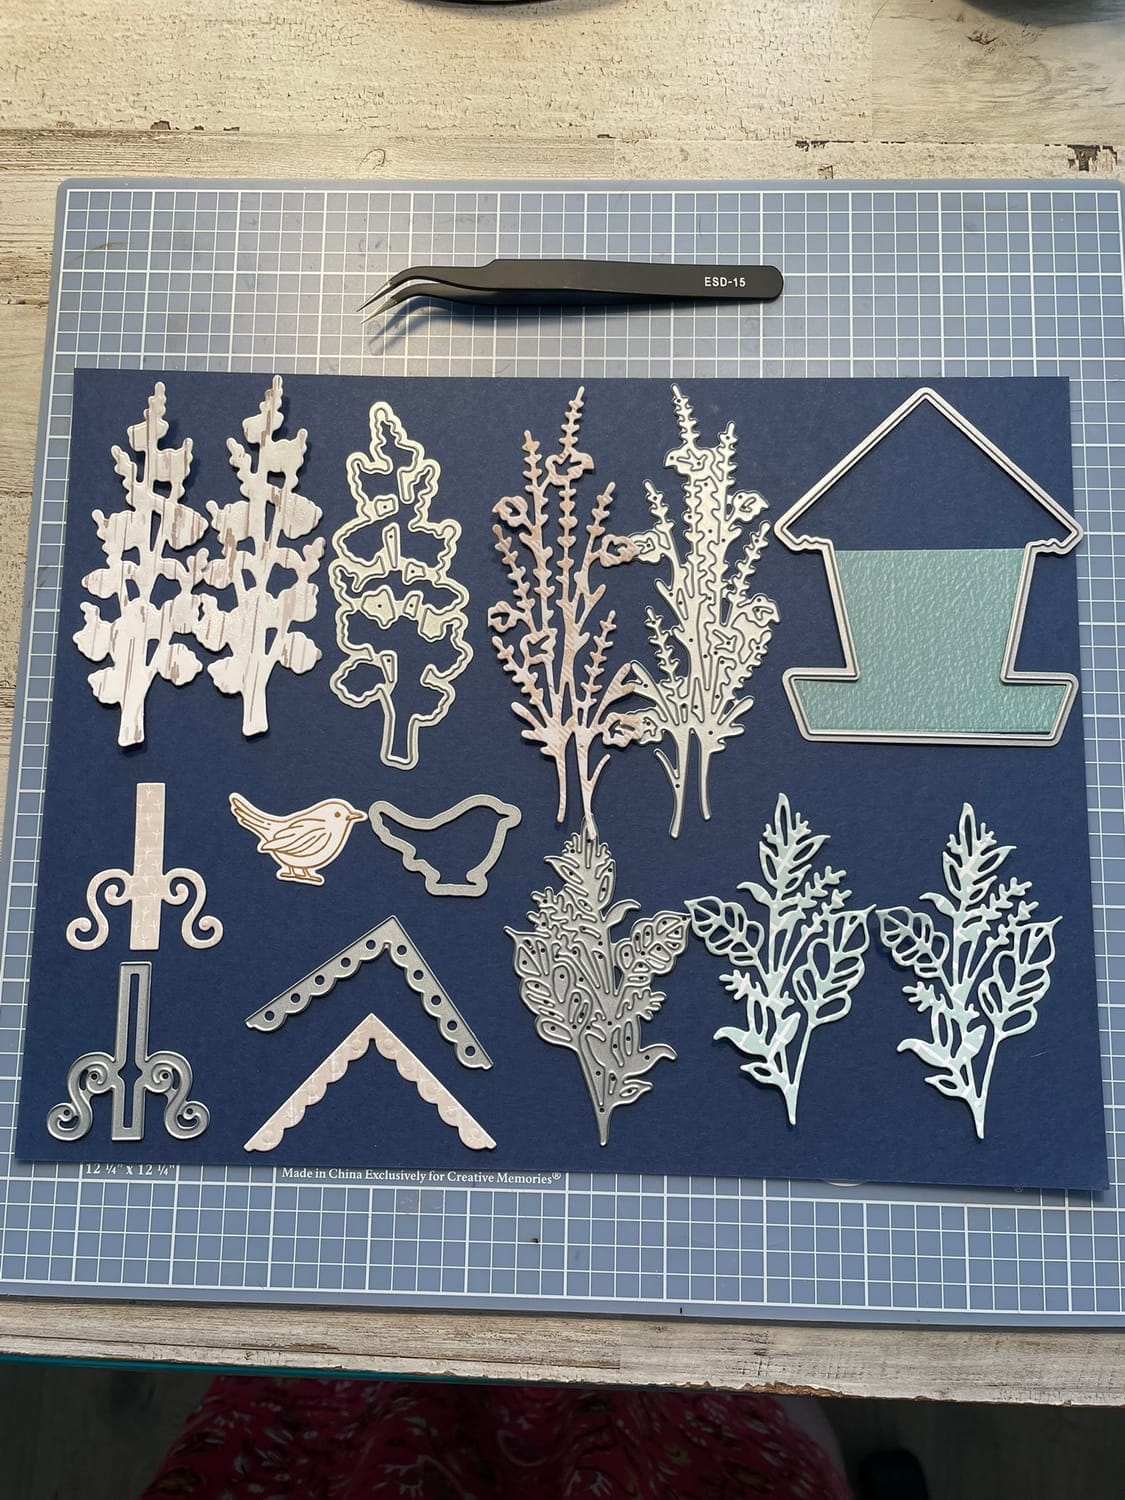
Do all the cutting of Dies, Cardstock & DSP or investigate your scrap bins for small pieces! *Everything I die cut out could actually be made from scraps!
THAT’S RIGHT MY STAMPIN’ FRIENDS….
Just be mindful of the color story that this card is telling. (if you want to replicate it exactly)
Subtle and only 3 colors (including cardstock, DSP and Inks) Hughes of Tan/ Creams, Whites and Dusty Blues (must die cut two sentiment frames if you want the border in another color, since this die comes out cut into two pieces) *if using Unbounded Love die
NEXT
Emboss the front panel layer & glue to card base. Apply Wink of Stella to white florals
THEN
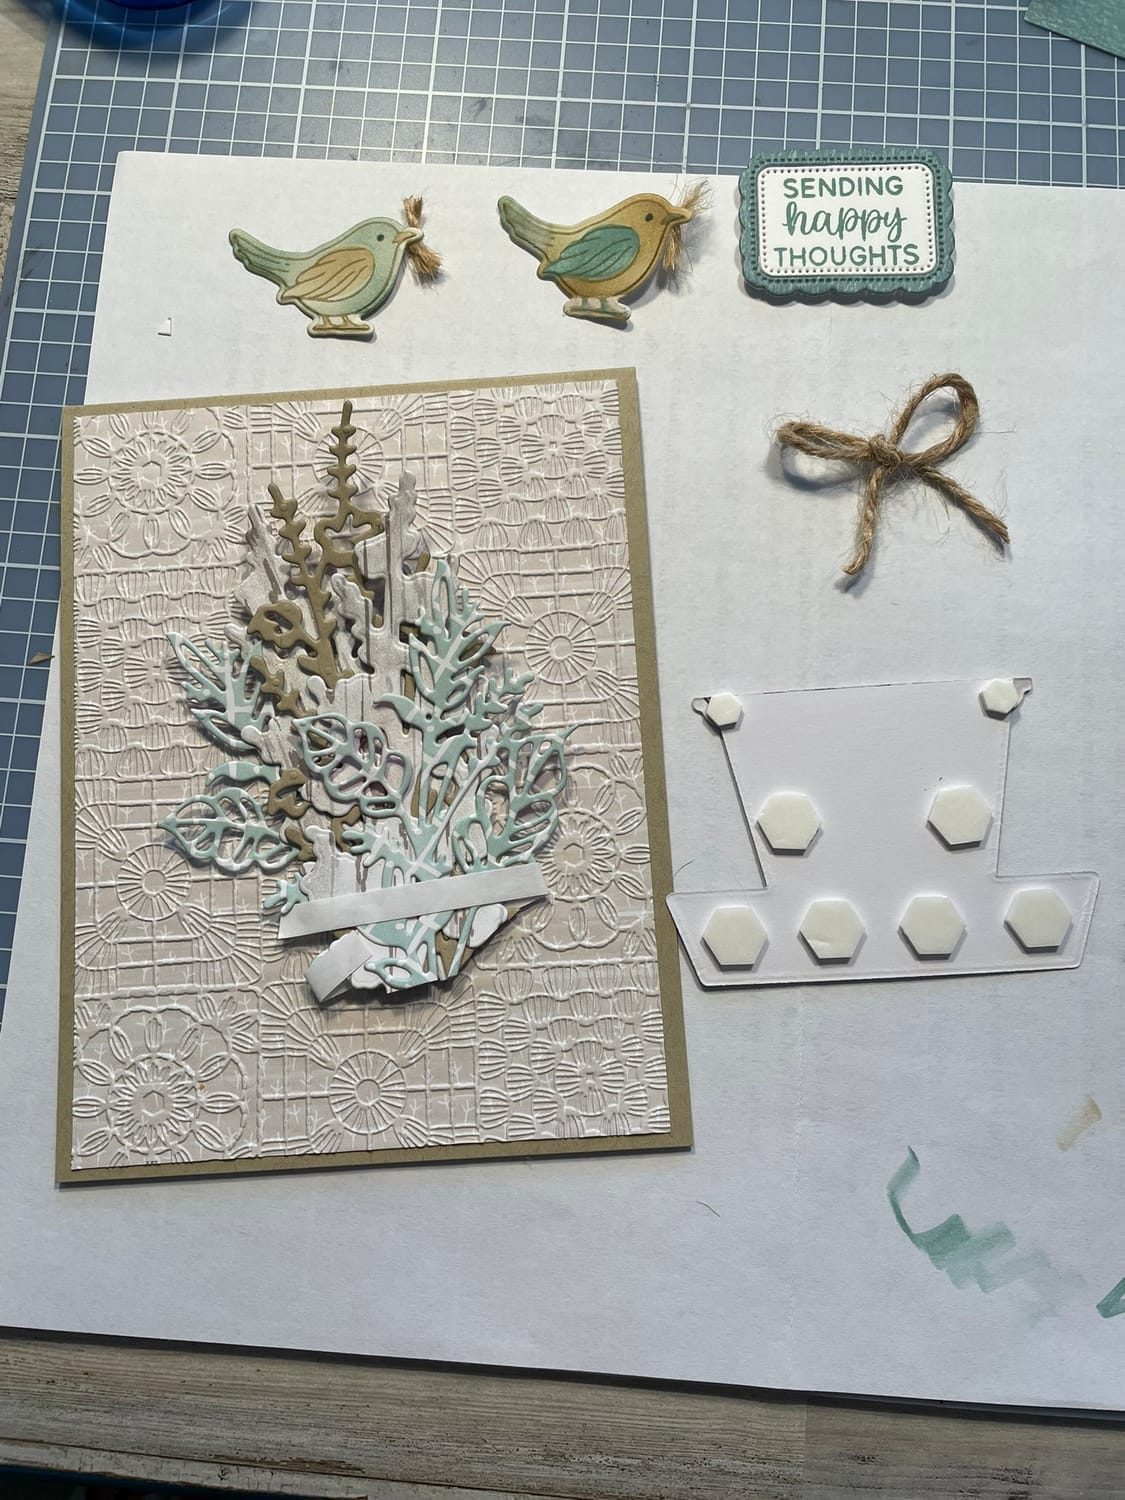
Pick up the die cut florals and the greenery pieces and arrange them in your hands. I layered mine back to front. Start with one DSP greenery pc, white floral DSP, crumb cake greenery pc, white floral then the other DSP greenery pc. Hold together and bind with double sided tear by hand tape. See photo sample for this step. (set aside)
NOW
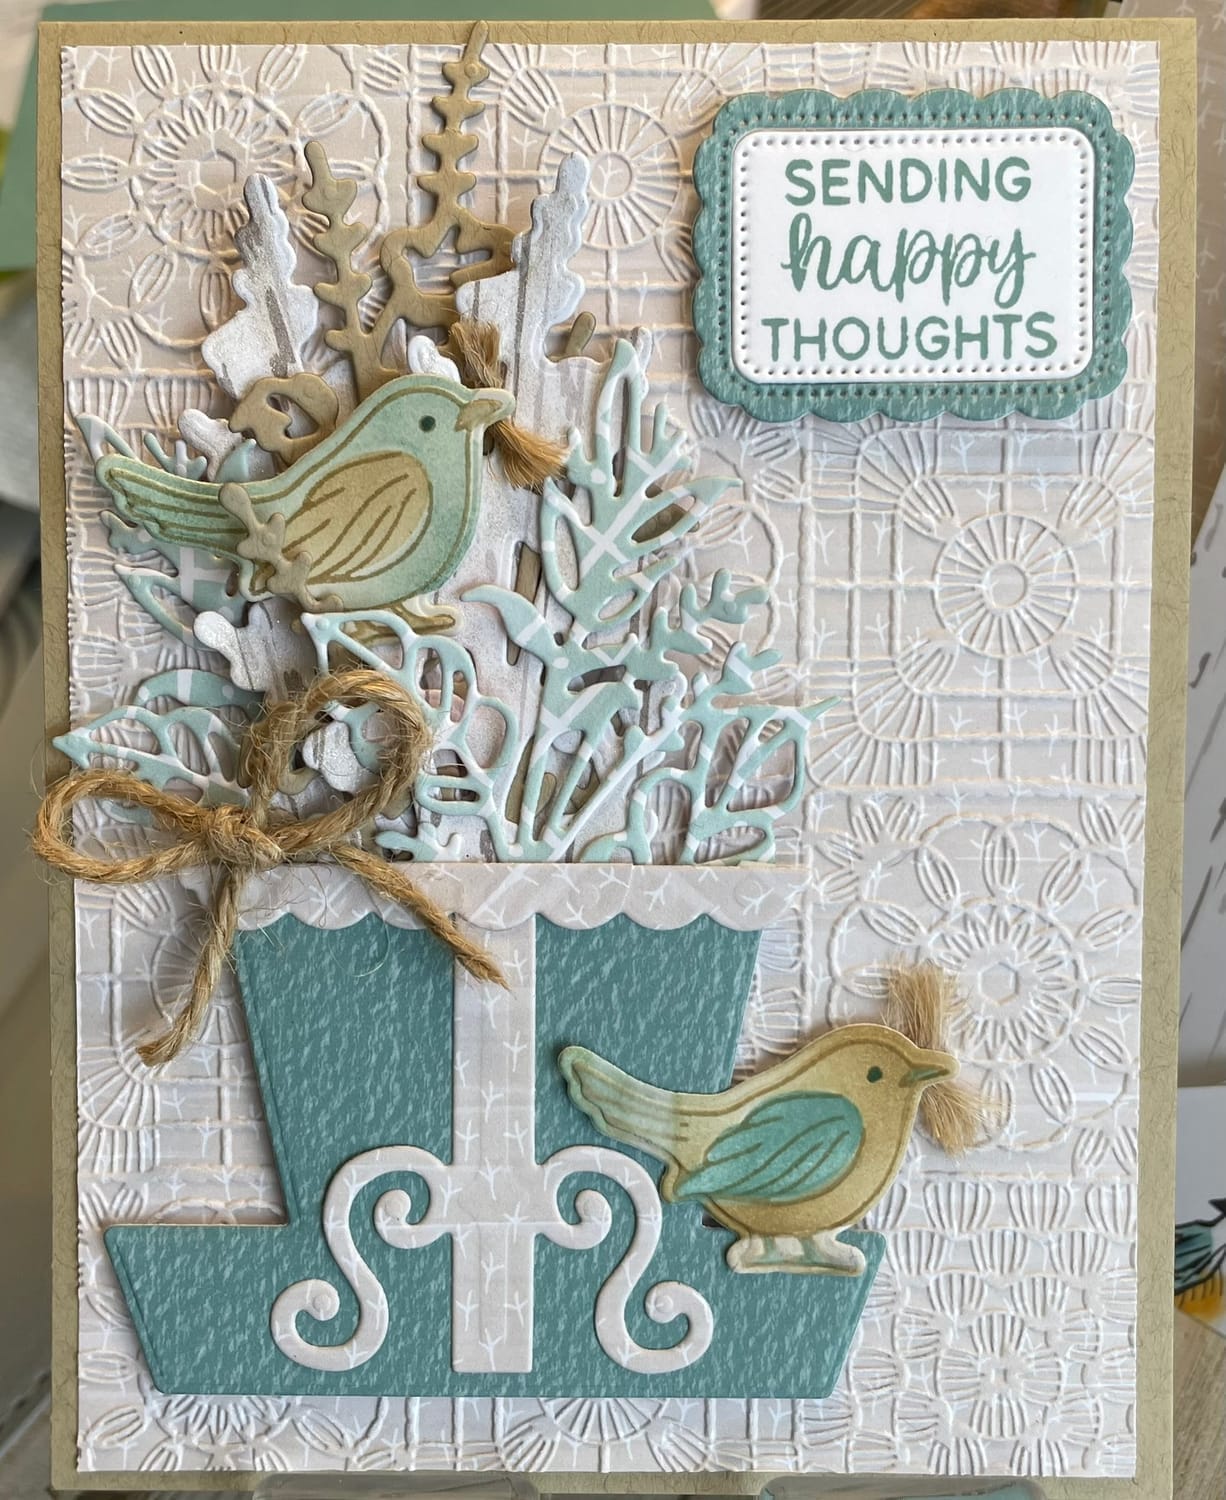
Time to glue the flowerpot pieces together. Cut the scalloped roof trim piece in half, lay pieces on top each other glue to form one with 7 total scallops. This will fit perfectly across the top of the pot. Place it there to get the height of the stand. Take the stand and lay it down on the pot under the scallop and cut the length to fit. Glue both pieces down onto the pot
TIME TO COLOR
Take both die cut birds and use blending brushes with Crumb Cake & Lost Lagoon ink.
To get the look of the birds like mine, cut out an additional bird and fussy cut out the wing and use this for masking. Cover feet & beak with post it tabs. Temporarily adhere wing to bird image and use blending brush and crumb cake color bird portions except beak and tail feathers and feet. Remove the wing mask and replace it with the bird image mask missing its wing and blend on the Lost Lagoon color. This will saturate the wing with Lost Lagoon, remove mask and blend tail feather to desired color. If you don’t want both birds to be the same, then use Lost Lagoon for the whole bird and Crumb cake for the wind masking. I used Stampin’ Write markers to color their feet and the beaks. Stamp Sentiments for Front and Inside panel.
ASSEMBLY
Place die cut bundled down more towards left side of card base with tear by hand adhesive second side of backing removed. Add Stampin’ dimensionals to back of flowerpot, see photo sample for this step. Be mindful to leave space for floral stems underneath when placing dimensionals. Place flowerpot directly on top of floral bundle. Then add a mini glue dot or two behind die cut floral images to secure. Add Birds with twine of your choice where desired. One of my birds is sitting on the planter base and required one dimensional under head to even out. (since the flowerpot is popped up)
My second bird is adhered onto florals with mini glue dots. Place sentiment on dimensionals and pop into position. Glue down the inside panel to complete the card.
"And there you have it—a delightful Country Birdhouse Spring Flowerpot Recipe that's as charming as it is simple! Whether you're gifting it to a fellow nature lover or adding a touch of springtime magic to your space, this creation is sure to bring joy. Plus, you can create a totally new Country Birdhouse card that’s so awesome, you can teach an old stamp set bundle new tricks! Happy crafting, and may your creativity bloom!"
Tutorial

Share this recipe & post
About me

Hi there 👋 My name is Tammy Dawn Tomei. Thanks for being here and checking out my creations.
Signup For My Tutorials, Designs, and Card Recipes Sent To Your Inbox
Receive notifications of new posts, recipes and my latest creations by email.
Get My Favorite Extra's
I recommend all of these products because I own them, use them, and love them.
Raye Craft Organizers
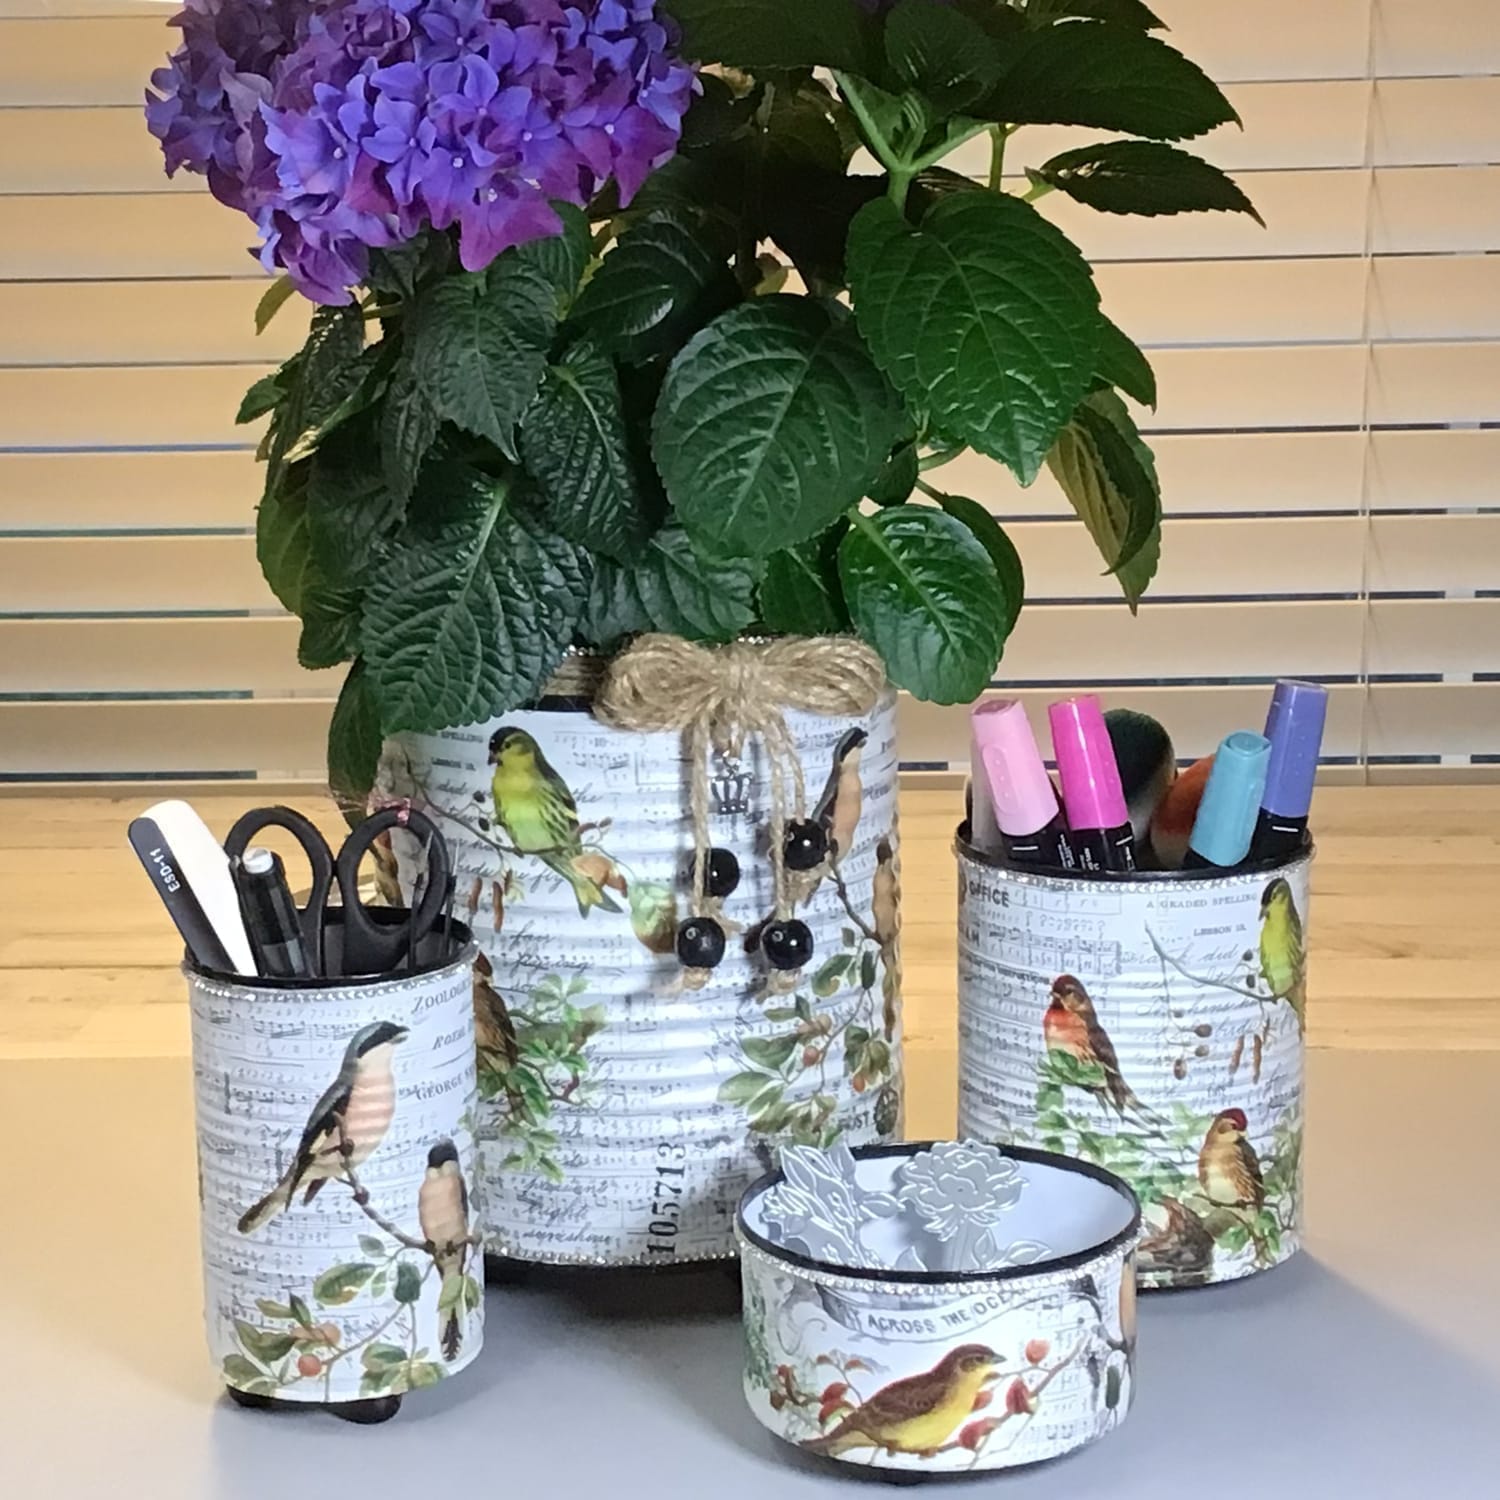
Where creativity blooms and every piece tells a story. Get a Handmade craft organizer by Dedrah Raye Creates
Get the Products You Need

2025 © Tammy Tomei. All Rights Reserved.
Tammy Tomei is an Independent Stampin' Up!® Demonstrator. This blog is owned and managed by Tammy Tomei and DMT Solutions, Inc.. Stampin' Up! does not endorse the use of the contents of classes, tutorials, services, or non-Stampin' Up! products that might be offered here.
As an Amazon Associate, I earn from qualifying purchases.


