Day at the Beach 3-D Scene Card
This stunning arched circle 3-D beach scene card was created using the Stampin' Up! Beach Day stamp set and Beach Day dies, Everyday arches dies, including the Stylish Shapes dies to cut the center and frame the tranquil ocean view. Layered die-cuts bring the sandy shore to life, featuring palm trees, a surfboard, beach chairs, and a cozy umbrella, all in soft coastal tones. Dimensional details, like rolling waves and soaring seagulls, add depth and movement, making this a perfect summer-inspired card for any beach lover!
Products Used (Click the link to view/order)
Card Recipe
DAY AT THE BEACH 3-D SCENE RECIPE
STAMPS, CARDSTOCK, DSP, INKS
EVERYDAY HAPPINESS DESIGNER SERIES PAPER
CARD BASES / 5 in total
2) 4 ¼ x 5 ¼ Die cut with Arch Die #10
1 ½ x 4 Die cut 2 waves
4 ¼ x 5 ¼ Die cut with Arch #10
CARDSTOCK
1 ¼ x 2 ½ (2 palm tree trunks, die cut)
GARDEN GREEN CARDSTOCK 3 ½ X 4 (4 palm leaves)
DSP
EVERYDAY HAPPINESS DESIGNER SERIES PAPER
4 ¼ x 5 ¼ Ombre piece from sand color to white, Die cut with Arch Die #10
4 ¼ x 5 ¼ All Blue variation section, Die cut with Arch Die #10
1 ½ x 3 (dot pattern, 2- chairs, stamp then die cut)
1 ½ x 4 (wild wheat with star pattern, 2 -shells, 2- grasses)
2 x 2 ¾ (vine stripe side, 2-gray seagulls, 1- beach ball stamp then die cut)
2 ¾ x 4 (vine stripe/ floral, USED BOTH SIDES, (floral 1 umbrella stamp then die cut 1- flag die cut / vine side 1-surfboard stamp directly up vine pattern die cut out) 1 cloud out of white ombre section, die cut out)
*There are 2 modifications from the “pictures “on the website in this recipe. I used the white ombre instead of the blue ombre for the 1 cloud. ALSO, I did not use the solid largest die cut with the big wave pattern. Left that piece out completely.
INKS
PRETTY PEACOCK CLASSIC STAMPIN PAD
EMBELISHMENTS
ASSEMBLY INSTRUCTIONS
FIRST
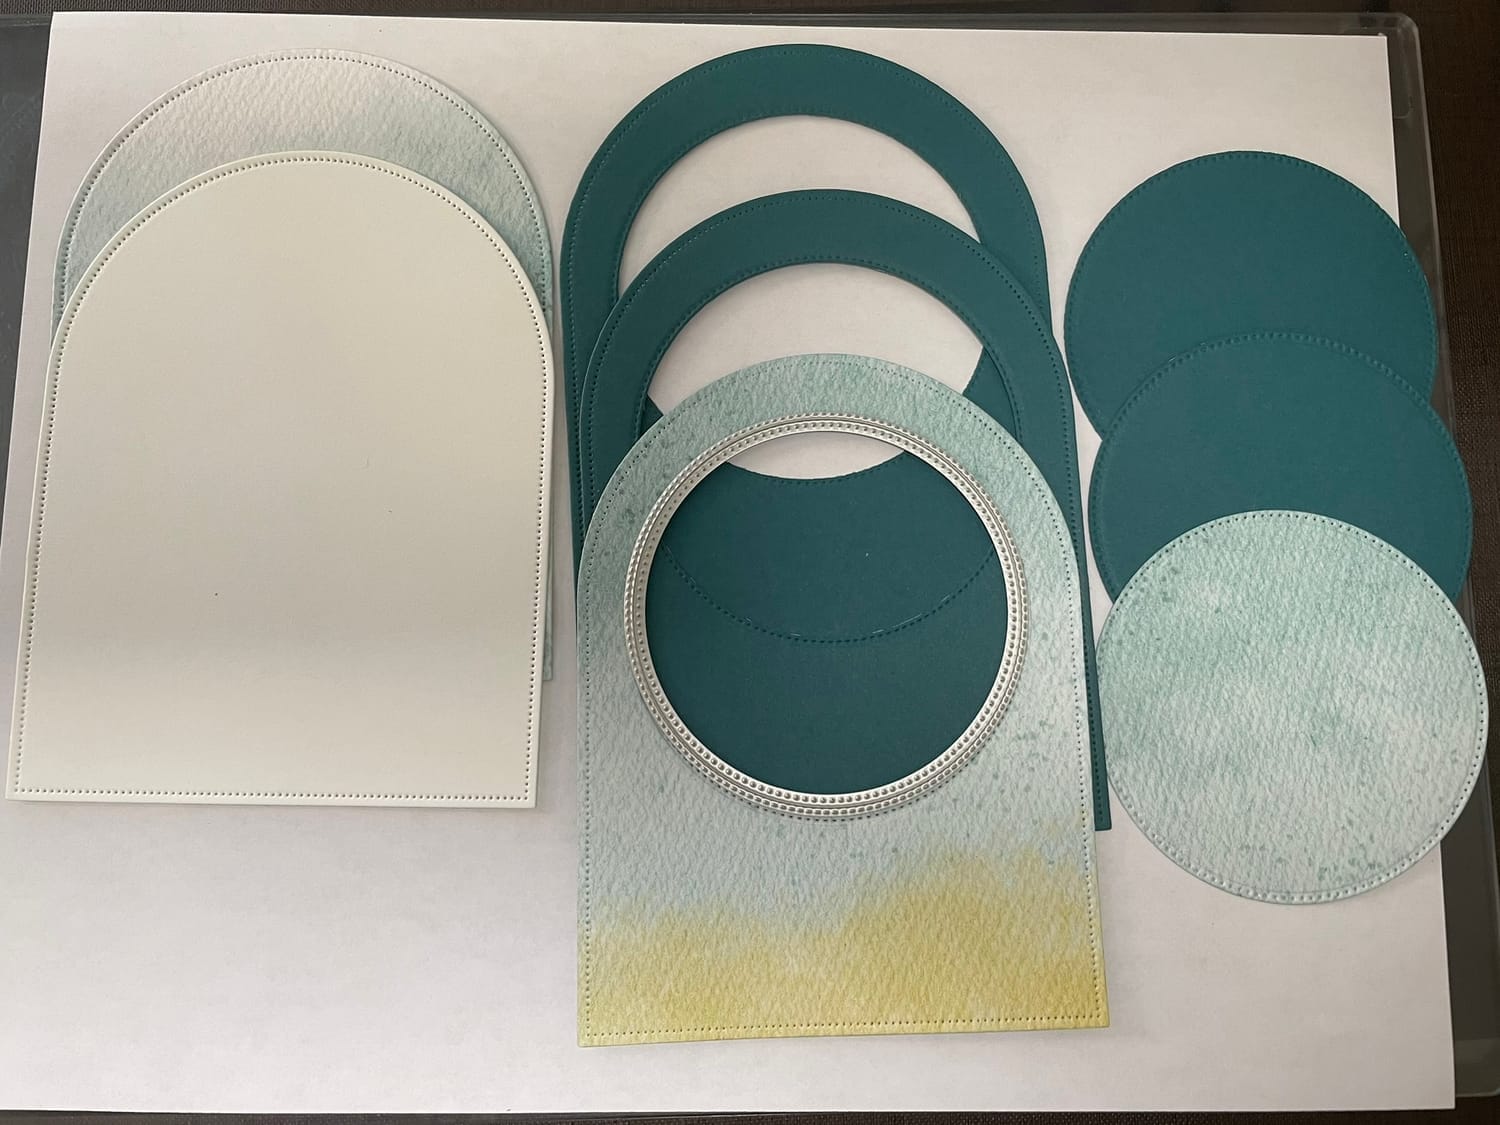
Cut ALL 5 card bases out with Arch Die #10
Stack the 2 -pretty peacock CS & 1- ombre DSP (the piece with sand at the bottom) place stylish shapes largest circle Die #6. I put mine approximately 5/8” from the top of the arch and approximately 7/8” on each side cut circle out of ALL 3 at the same time. (this will ensure the circle is exactly in the same location)
Glue 1-basic white CS to 1-ombre DSP (the pc colored from darker blue to white)
Back-to-back with the finished sides facing out. The basic white side will be the back of the card, and the other side will be the backdrop for your beach scene. Glue 1-pretty peacock CS & 1- ombre (with sand) together. This will be the first layer of your beach scene. Keep all the rest of the nesting stitching finished side towards the front on all pieces of CS. You should have 3-Arched card bases ready to decorate and start your beach scene
NEXT
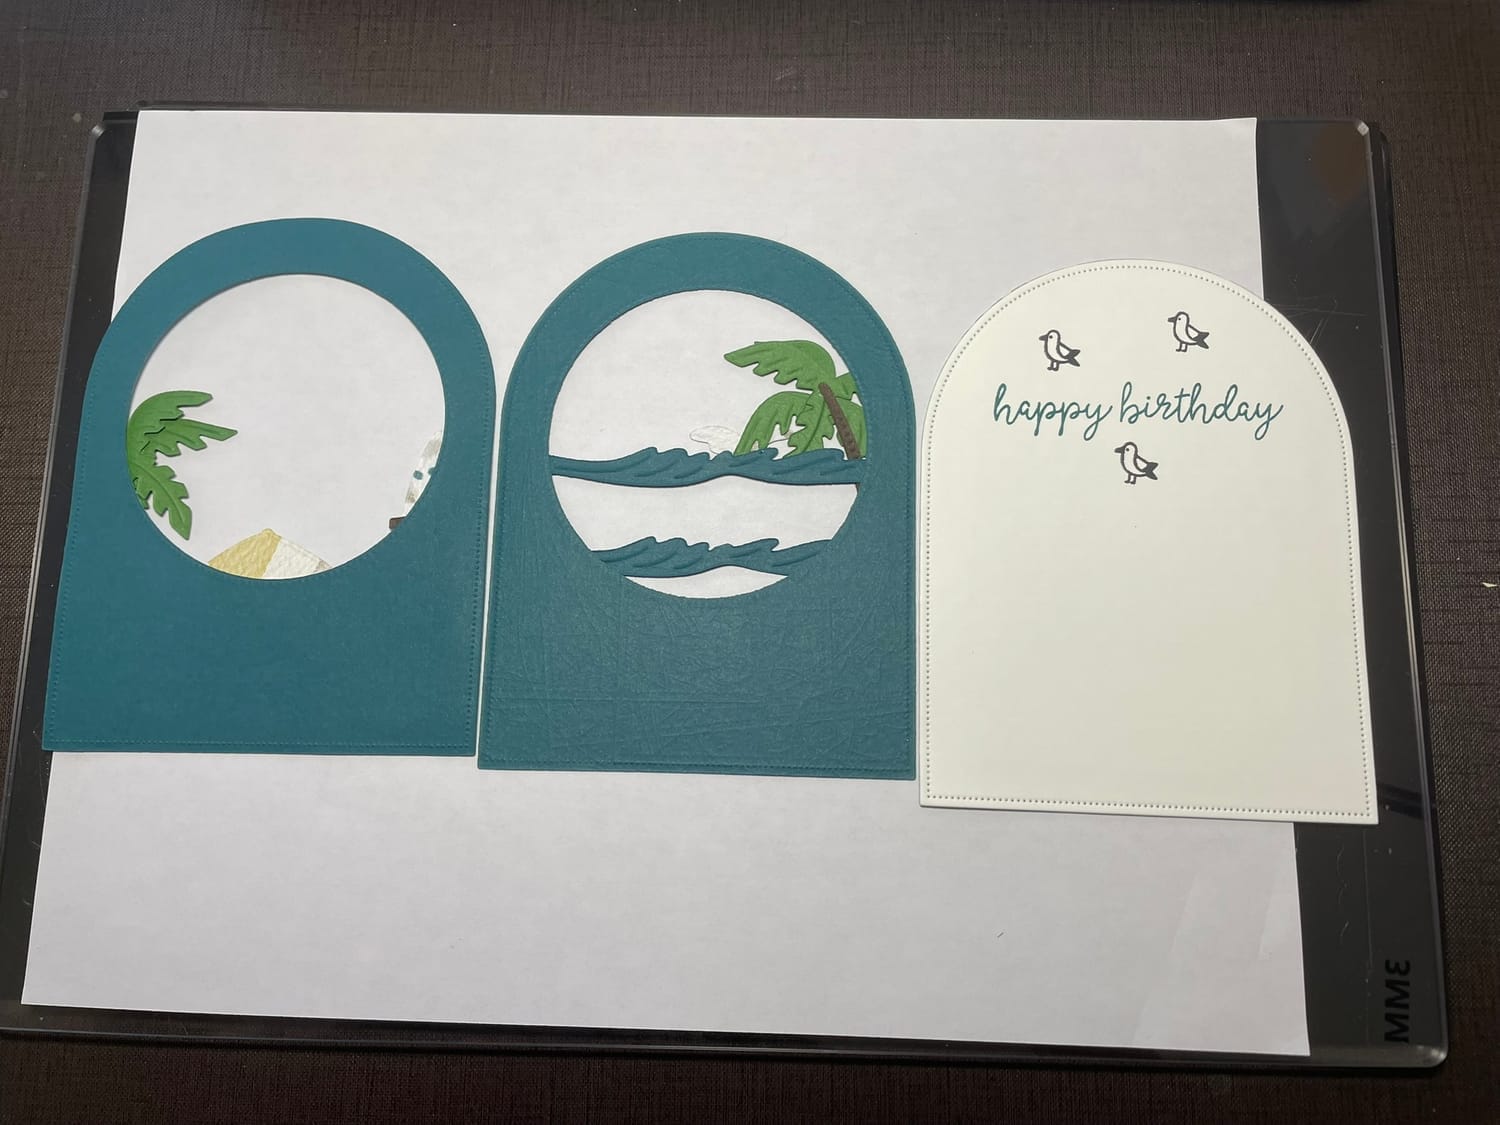
In Tuxedo Memento Black Stamp 2-chairs, 2-seaguls,1-beachball,1-umbrella. Stamp the sentiment of your choice on the Arched piece of basic white. *I used Happy Birthday and 3 small birds. Now is the time to use the Wink of Stella, (if desired) brush 2-shells,1-umbrella, 2-seaguls,
1-cloud, 1-flag. Set aside to dry.
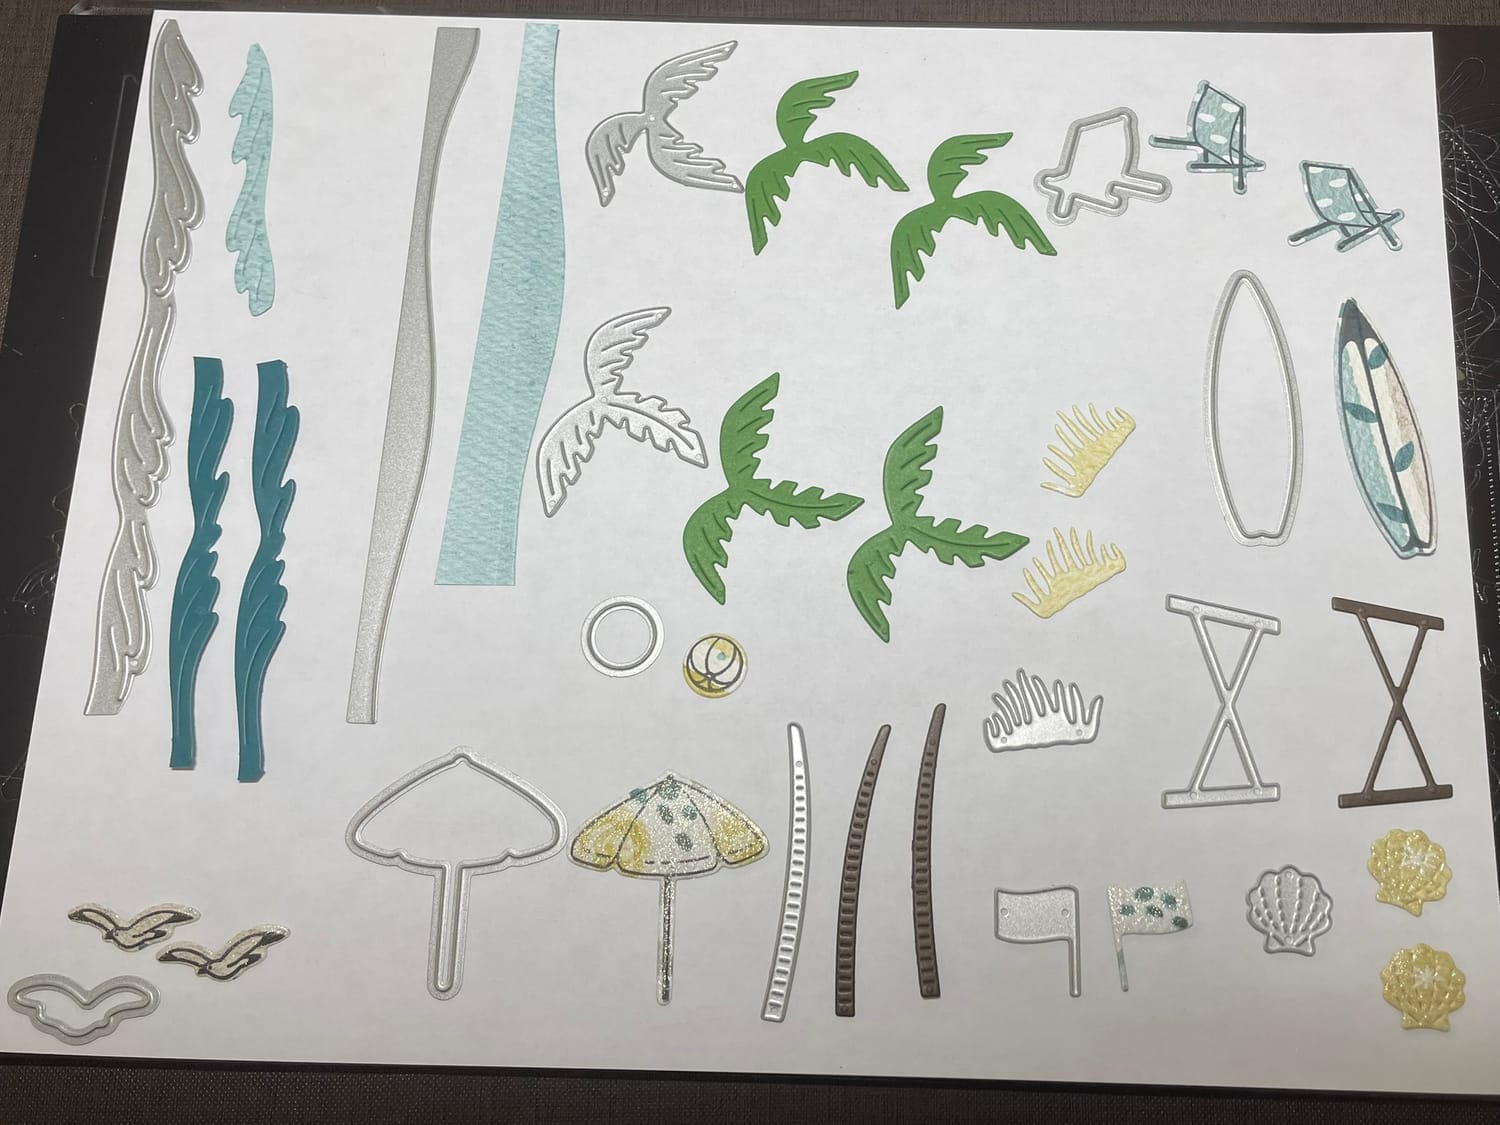
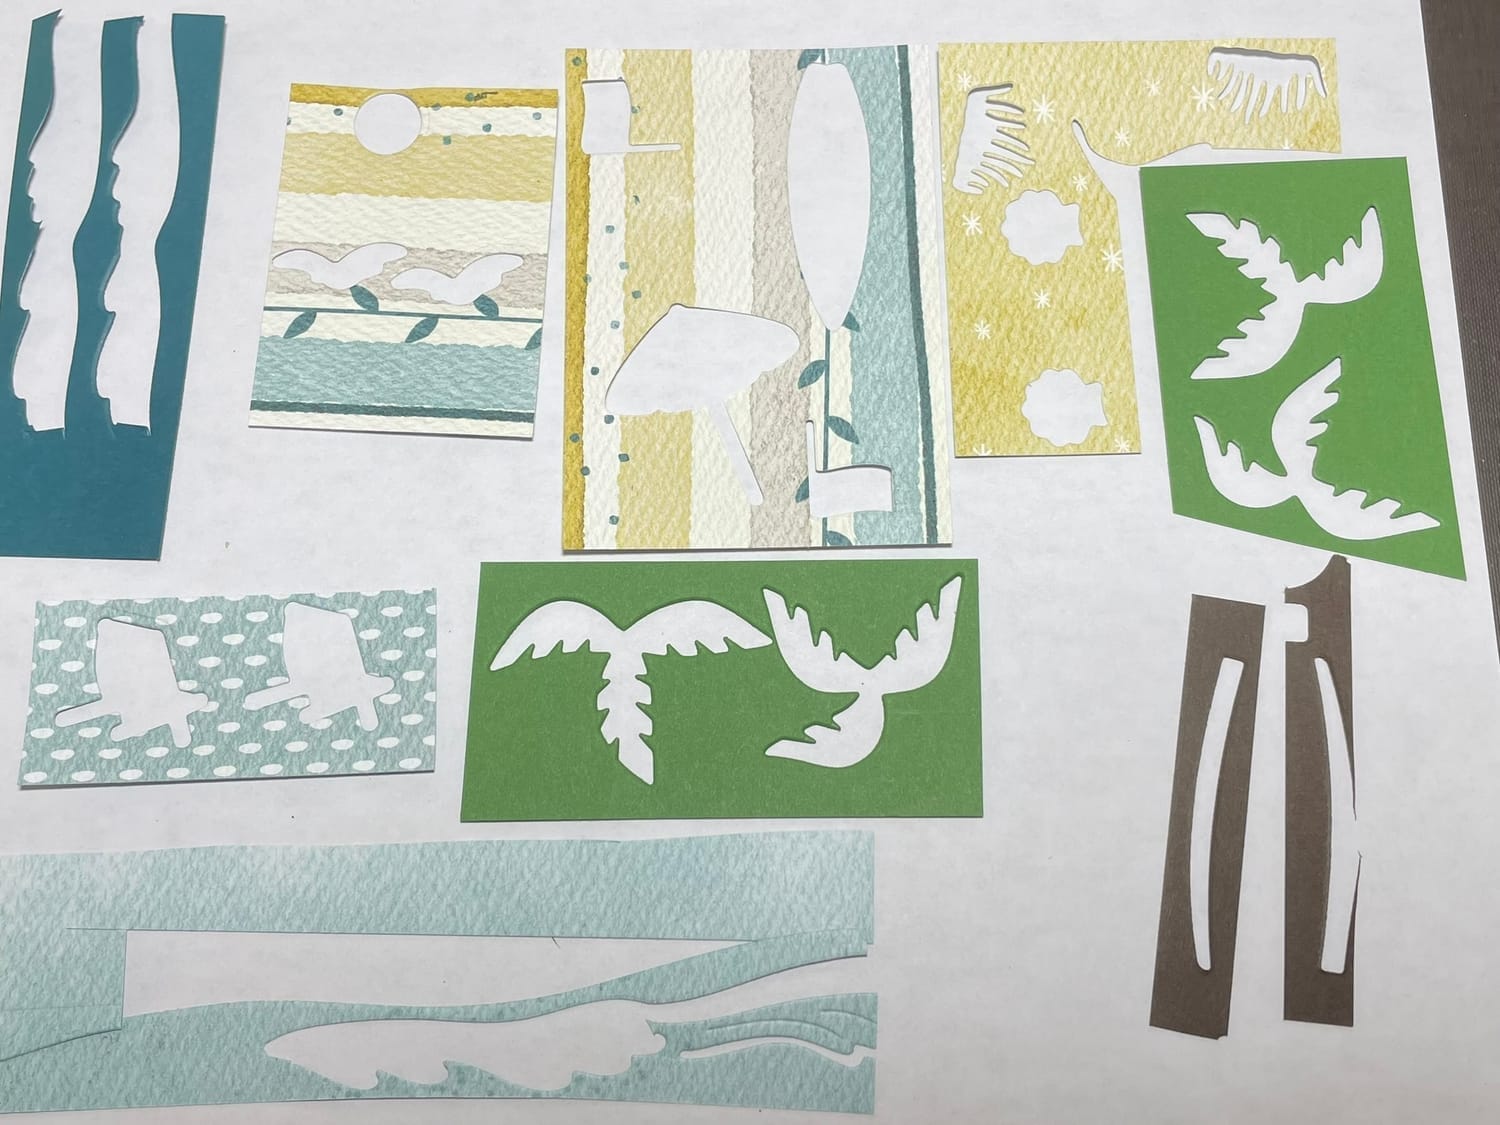
The remainder of the die’s cuts are all stand alone, and no stamping is required. Die cut ALL the Beach Day pieces out (see sample picture) If you do not have this DSP use the paper of your choice, or colored Cardstock
THEN
Arrange beach scene as shown in picture. The palm on the front will need its two right side frons pruned down to fit inside the card perimeter. Glue down, *liquid glue is recommended. Overhang the Palm tree, surfboard & umbrella into the circle. Do not put glue on the portions overhang.
NOW
Time to glue the second layer onto the 1-pretty peacock CS. This is where you start to add the 3-D effect of the card. Place 2 waves, second palm tree and 1-seagul. I used mini post it tabs to test for accuracy of placement. Place the front layer over and give it a good look and adjust your waves accordingly. I placed my first wave just at the height of the top of my umbrella. I used mini glue dots to attach the palm fronds together and liquid glued the trunks down. Take back panel and place the 1-ombre white DSP cloud, 1-seagul. Stack all 3 layers together, give it a good look and adjust as desired. When happy glue back panel pieces into place.
TIME TO CONNECT ALL LAYERS
Take ALL layers place on top each other. THE LOOK SHOULD BE AMAZING AND COMPLETE!!!! Use a fair amount of the liquid to maneuver and keep the layers secure. Now start with the middle layer and glue it down around the arch and bottom of the panel to the back panel. I found that standing them up together is the best way to align perfectly. Now place the front panel with the beach scene arch and glue it onto the middle section. You have completed making this perfect summer-inspired card for any beach lover!
Tutorial
Everyday Arch Die #10 Cut out 2-DSP, 2-Lost Lagoon CS,1-Basic White CS
Stack Lost Lagoon & 1-DSP (Ombre style)die cut with Stylish Shapes #6 circle out of the top (all at the same time) This will ensure the circle is in the exact spot on each piece. THEN glue the Basic White CS on to the all blue DSP
(back to back)NEXT glue DSP (Ombre style) onto Lost Lagoon CS
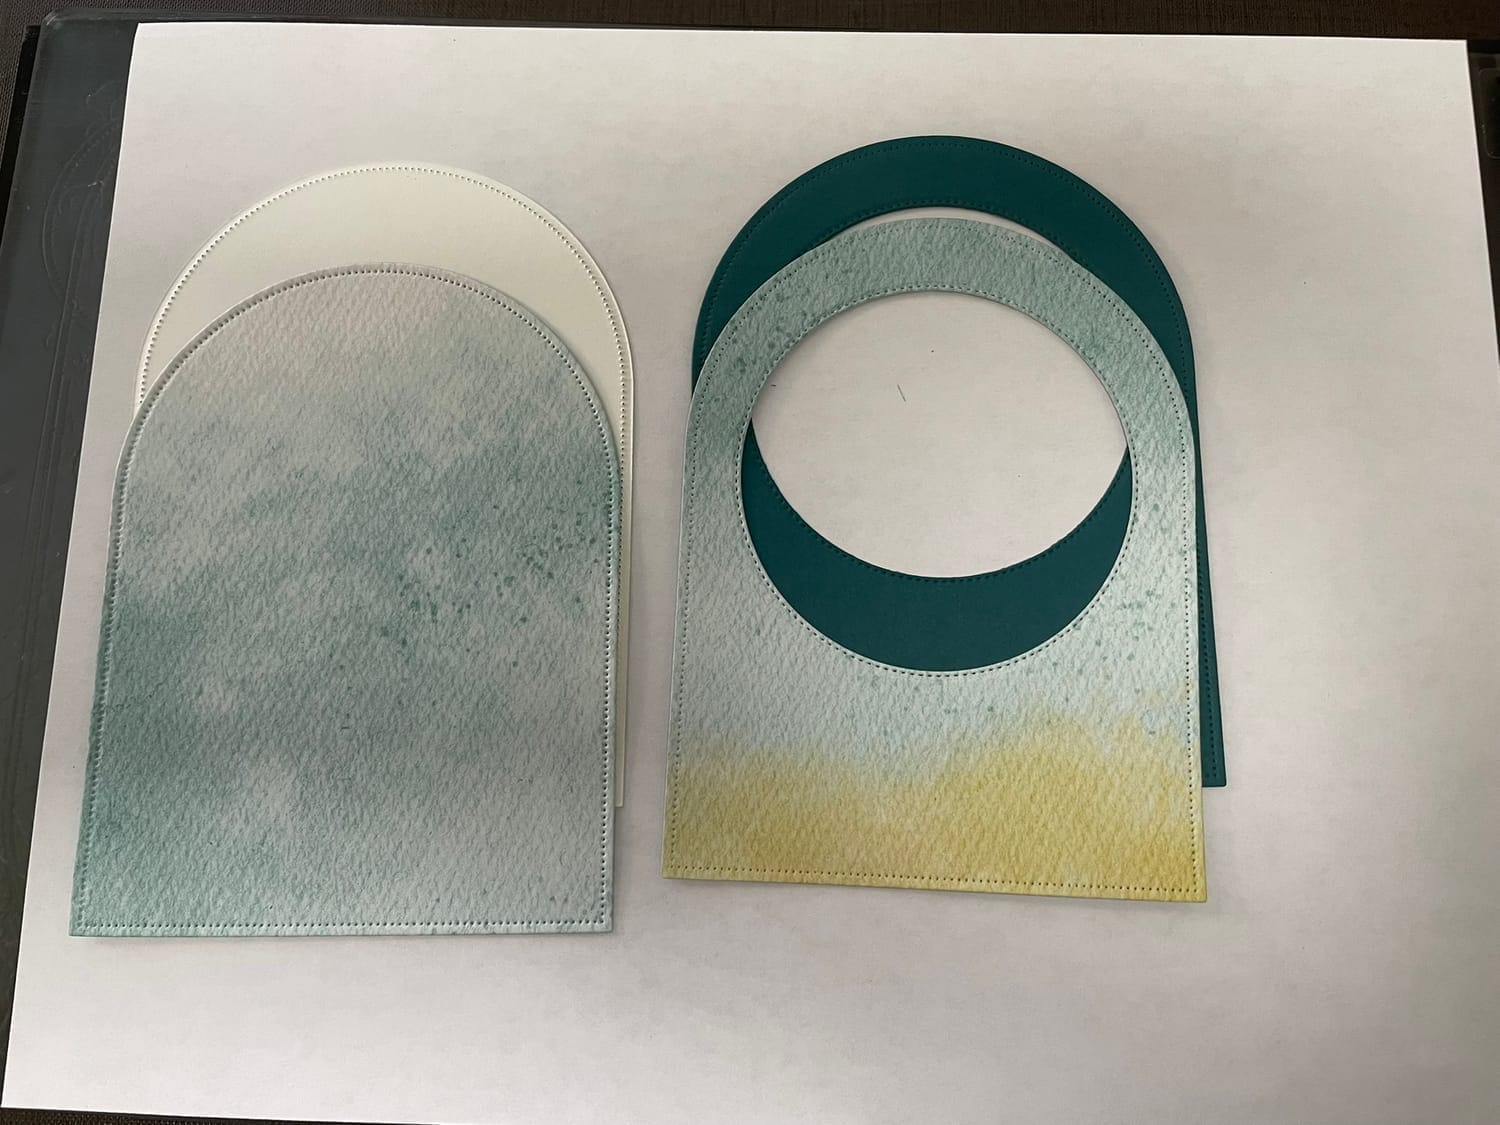
These will be your front and back layers
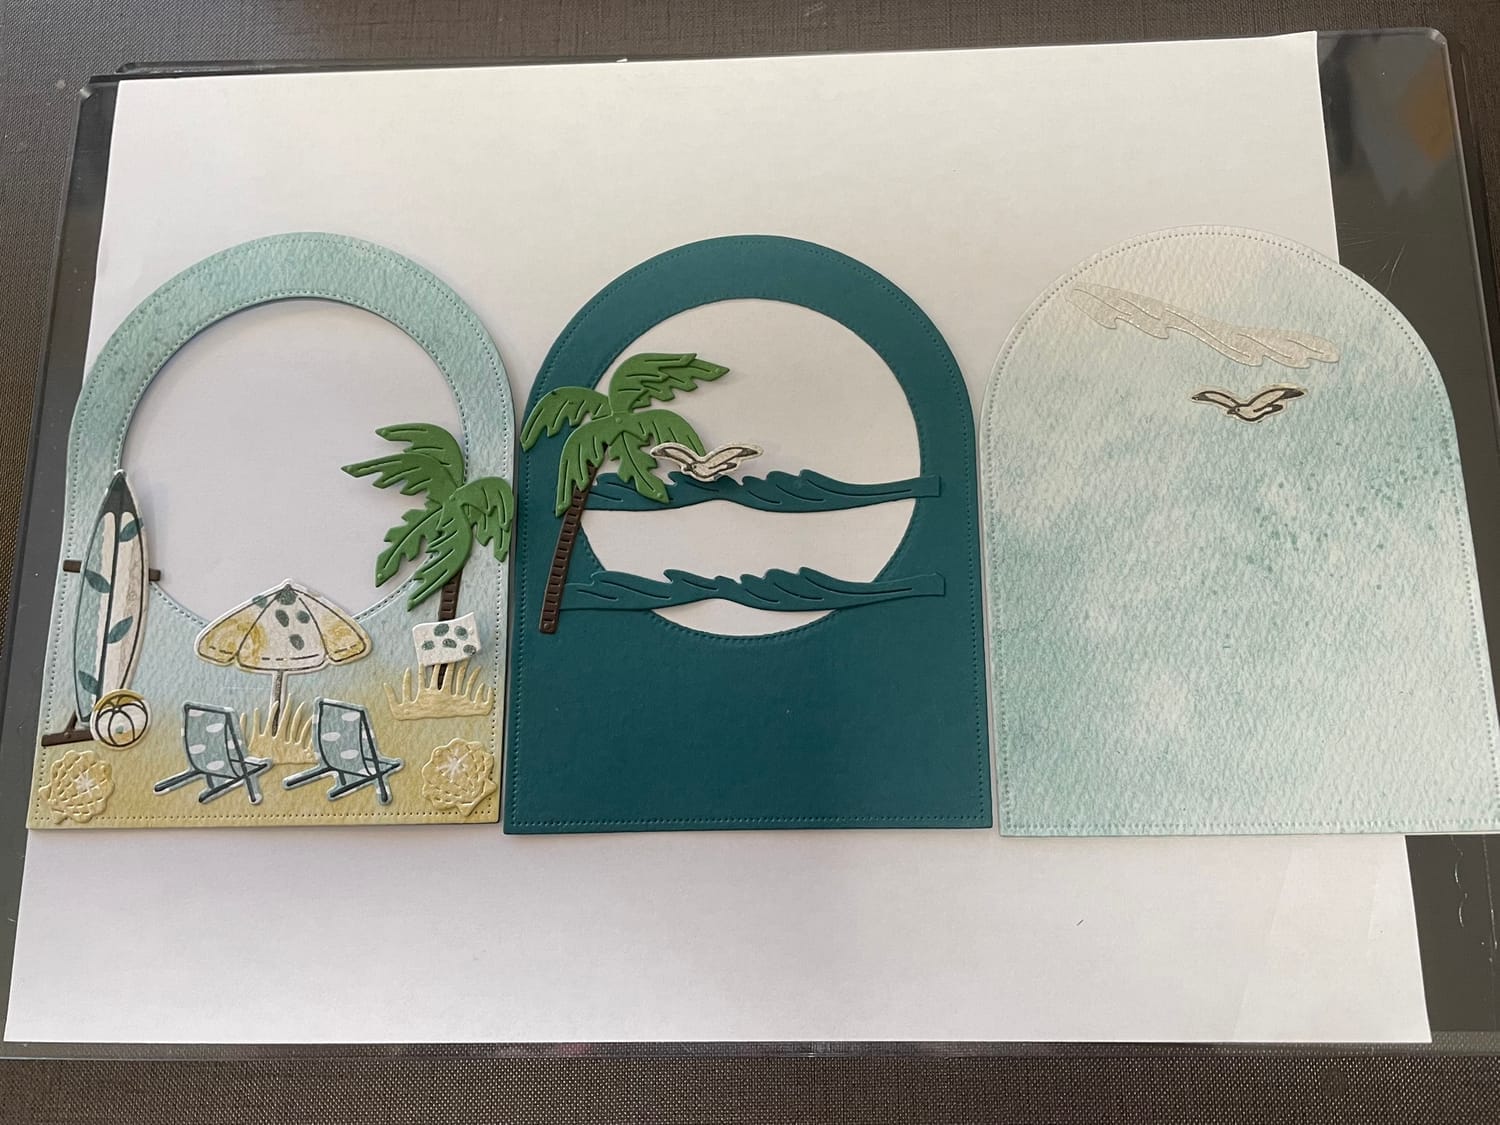
The pictures above shows all three finished layers, Front & Back
Now one by one layer and glue each card base together. Starting from the back panel adhearing the middle, then the front beach scene!
Happy Stamping! Making cards is super fun and easy with the right tools and a little creativity.

Share this recipe & post
About me

Hi there 👋 My name is Tammy Dawn Tomei. Thanks for being here and checking out my creations.
Signup For My Tutorials, Designs, and Card Recipes Sent To Your Inbox
Receive notifications of new posts, recipes and my latest creations by email.
Get My Favorite Extra's
I recommend all of these products because I own them, use them, and love them.
Raye Craft Organizers
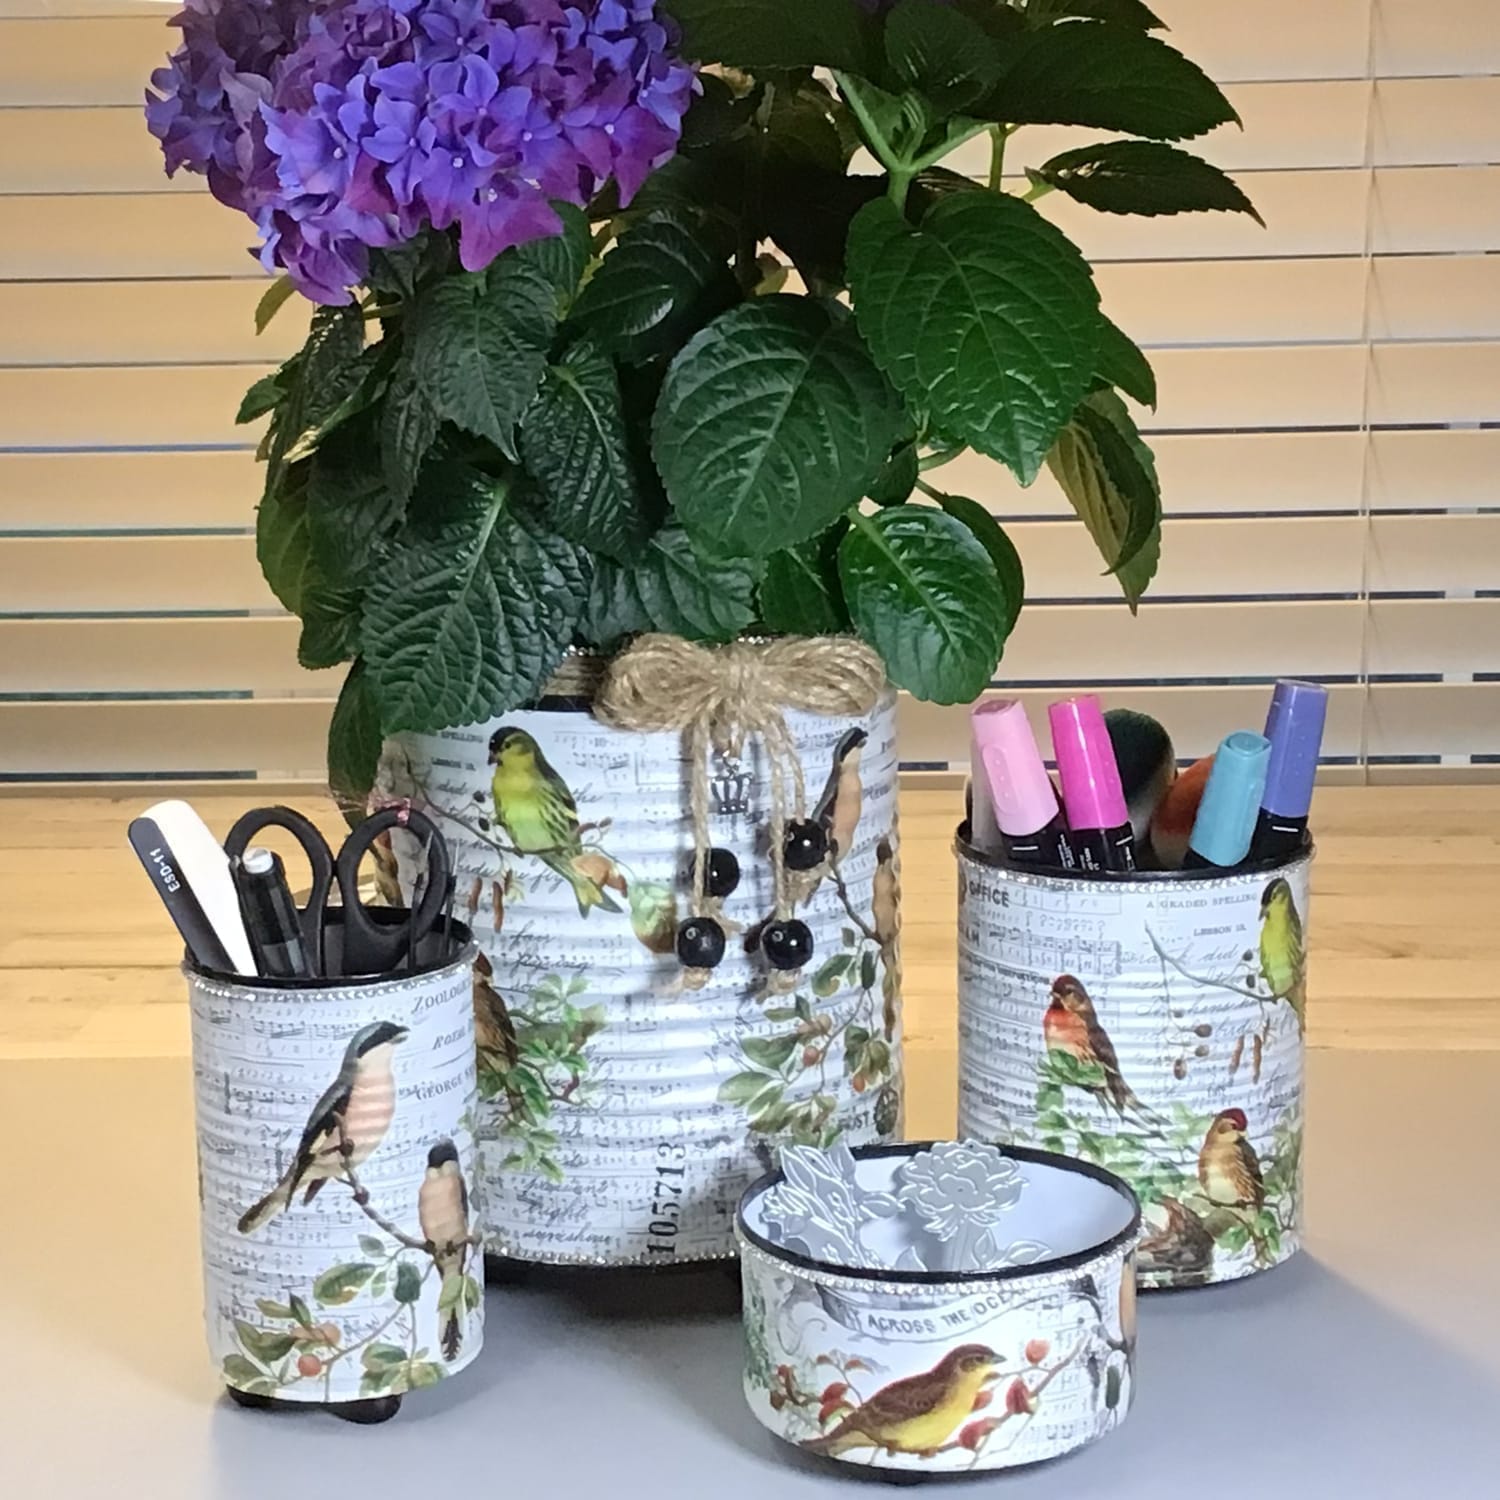
Where creativity blooms and every piece tells a story. Get a Handmade craft organizer by Dedrah Raye Creates
Get the Products You Need

2025 © Tammy Tomei. All Rights Reserved.
Tammy Tomei is an Independent Stampin' Up!® Demonstrator. This blog is owned and managed by Tammy Tomei and DMT Solutions, Inc.. Stampin' Up! does not endorse the use of the contents of classes, tutorials, services, or non-Stampin' Up! products that might be offered here.
As an Amazon Associate, I earn from qualifying purchases.


