🍂 Gathering Together Flip-Flap Fancy Fold🍄
🍂🐦 Gathering Together Flip-Flap Fancy Fold 🌿🍄
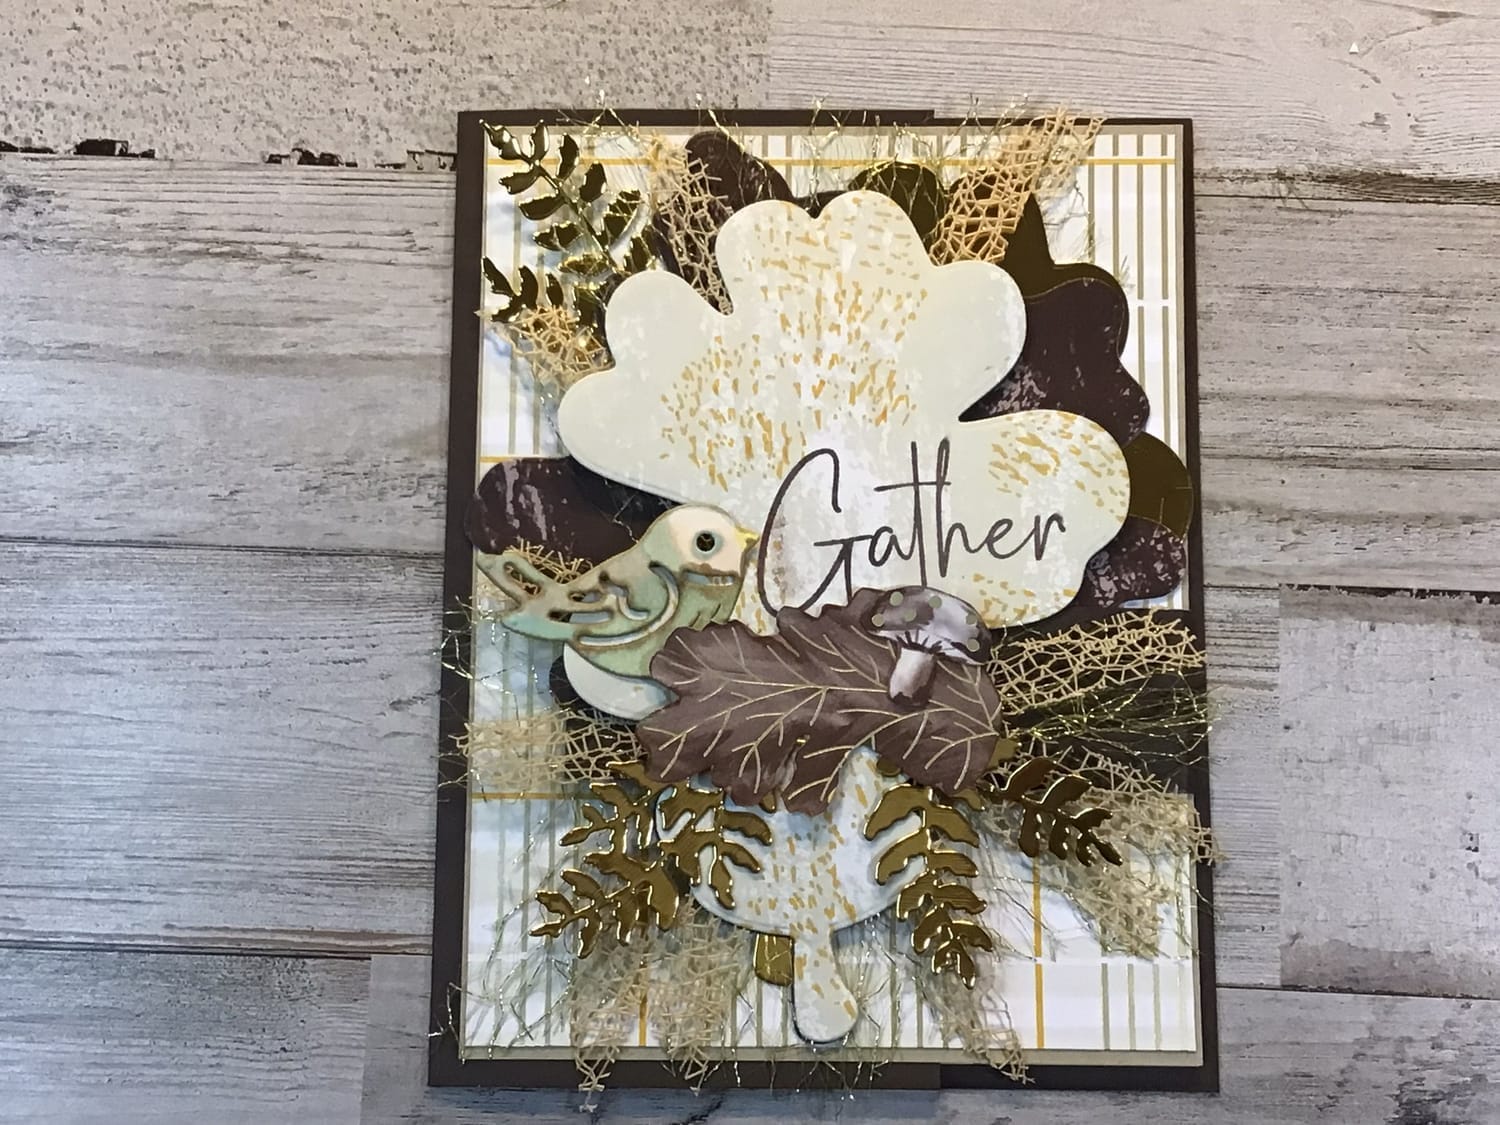
This week’s card captures the heart of autumn gatherings — full of texture, shine, and little surprises at every turn. Built on a strong Early Espresso base, the design begins with a backdrop of Gold Champagne Foil plaid, instantly setting a warm, elegant tone. The Flip-Flap Fancy Fold construction adds movement and intrigue, giving this card the feel of a keepsake.
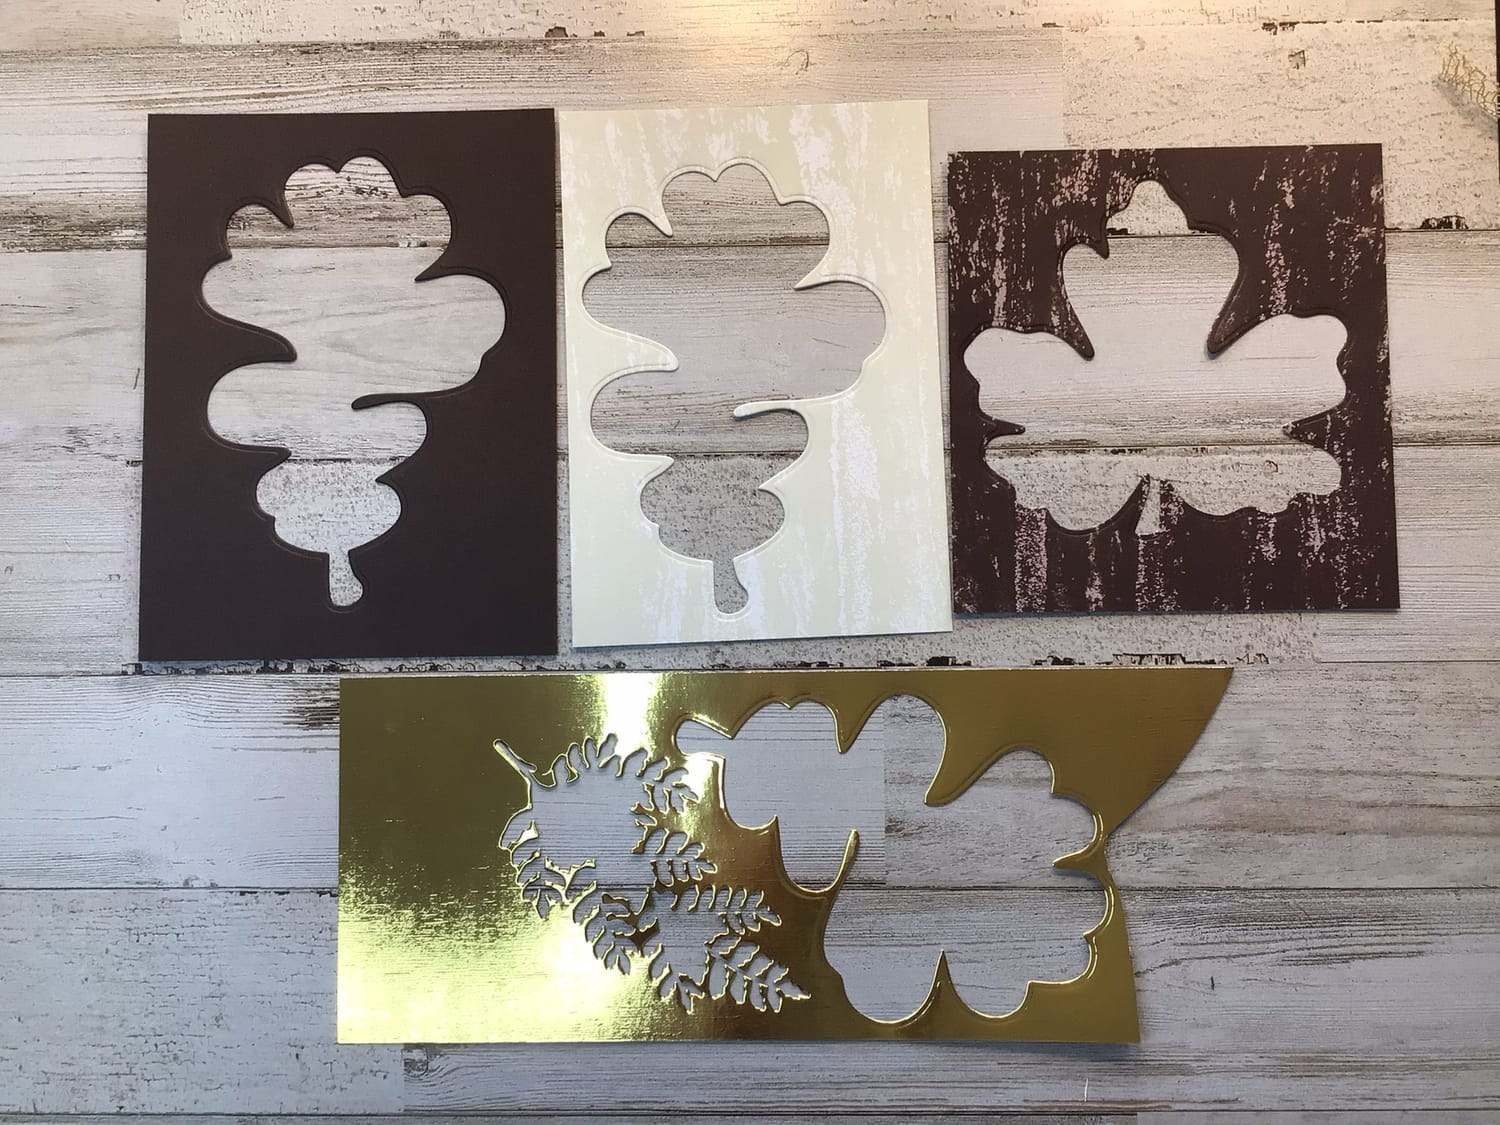
Layered leaves steal the show: a large maple leaf in wood grain, paired with a shimmering gold elm leaf, nestle together with gold ferns cut from the Textured Metallics. Peeking through are soft trims — the open weave and the new irregular weave — creating dimension and a touch of rustic charm.
The sentiment “Gather” in Early Espresso ink takes center stage on the focal leaf, surrounded by charming details: a sweet bird from the retired Birds & More Dies, and delicate mushrooms and leaves fussy cut from DSP. To finish it all off, the card is held closed with a hidden magnet, making the interactive flip reveal even more delightful.
✨ Ready to put your own little sparkle into someone’s day. ✨
Scroll below for all the details, supplies, and a little bit of magic from yours truly!💕
🛍️ Featured Products of the Week 🛍️
This week’s featured products are the Gathering Moments Bundle, the Gathering Together DSP, the Beautiful Motif Dies for the fern, and both the Open Weave Trim and the Irregular Weave Trim for texture and elegance. 🌿🍂✨
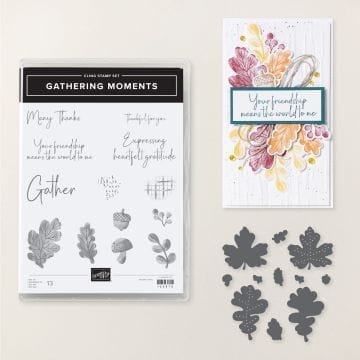
GATHERING MOMENTS BUNDLE
#165980

BEAUTIFUL MOTIFS DIES
#165205

TEXTURED METALLIC SPECIALTY
#163772
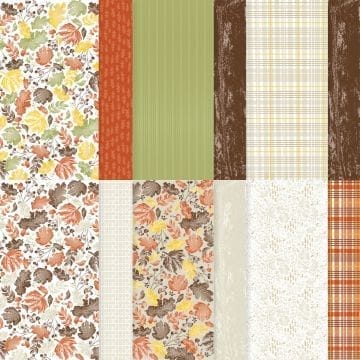
GATHERING TOGETHER DSP
#165969
💌 Why You’ll Love Making This Card
🍂✨ You’ll love making this Flip-Flap card because it’s full of rich autumn textures, shimmering foil accents, and the fun surprise of a hidden magnet. It’s cozy, interactive, and elegant all at once — a design that brings WOW factor with every flip and flap, and pure joy in every step of creating it. 🌿💌 — meaning you’ll get a big WOW result without a lot of fuss. Your friends and family won’t just admire this card; they’ll treasure it as a keepsake. 🍂🌸
I USED BIRDS & MORE DIES. * For the little birdie (retired)
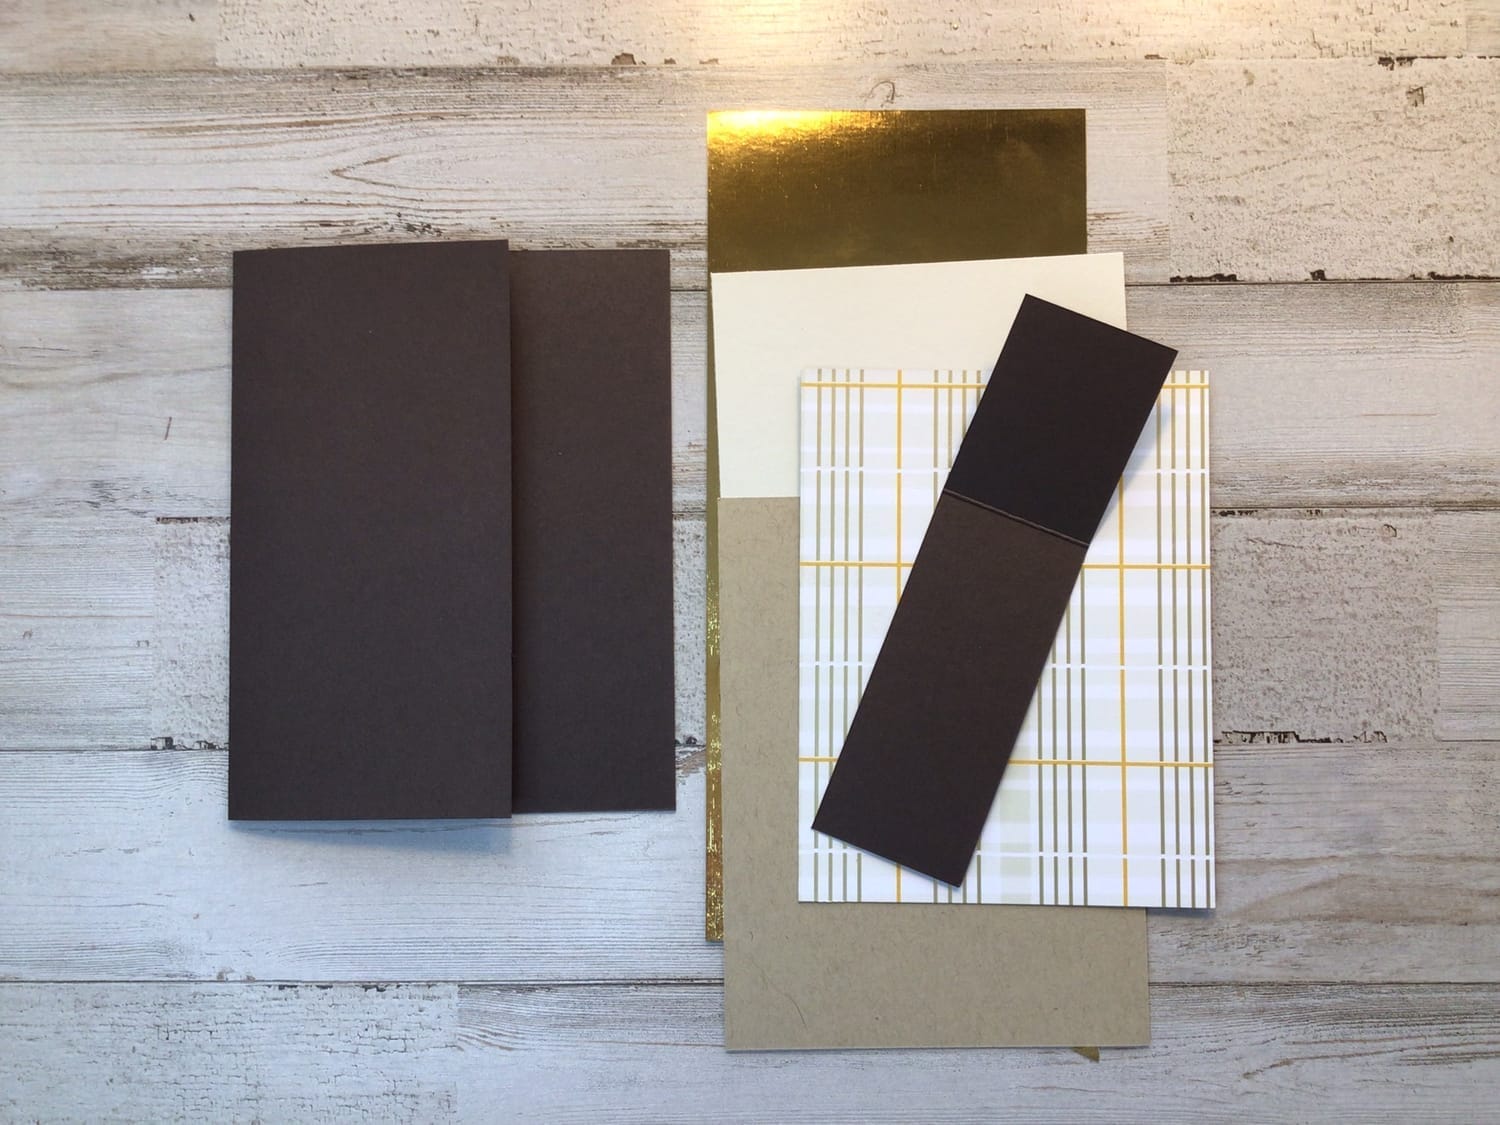
BASE + MATS & DSP
GATHERING MOMENTS FLIP-FLAP
DIE CUT NEGATIVE IMAGES
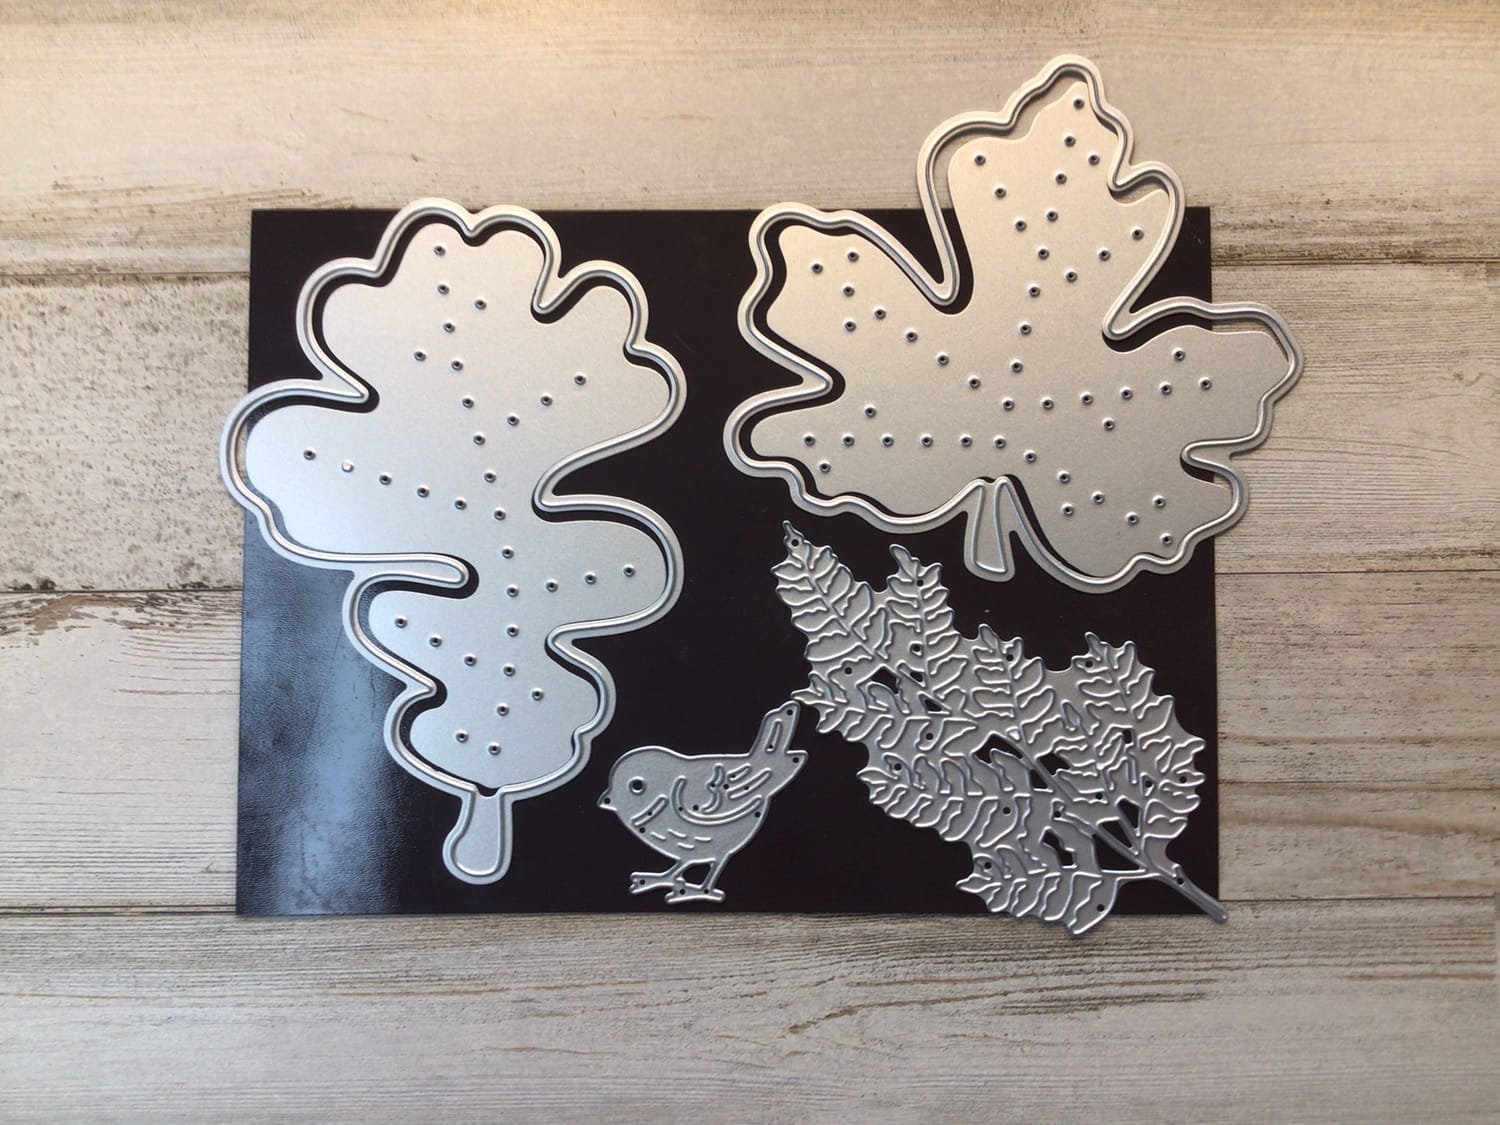
DIES: 2- GATHERING MOMENTS
1-BEAUTIFUL MOTITS
1-BIRDS & MORE
Products Used (Click the link to view/order)
STAMPS - DIES - EMBOSSING FOLDERS
BIRD & MORE DIES (retired)
PAPER
BASIC WHITE CARDSTOCK (scrap IF adding bird)
GATHERING TOGETHER DESIGNER SERIES PAPER
TEXTURED METALLIC SPECIALTY PAPER
INKS
EARLY ESPRESSO CLASSIC STAMPIN PAD
CRUSHED CURRY CLASSIC STAMPIN PAD
BLENDS (IF adding and coloring the bird)
PETAL PINK STAMPIN BLENDS COMBO PACK
SOFT SEA FOAM STAMPIN BLENDS COMBO PACK
CRUMB CAKE STAMPIN BLENDS COMBO PACK
PECAN PIE STAMPIN BLENDS COMBO PACK
EMBELLISHMENTS
MINI MAGNETS (my link from Amazon)
GOLD OPEN WEAVE TRIM (LAST CHANCE LIST )
ADHESIVES
Thanks for stopping by to see this week’s
🍂✨ Gathering Together Flip-Flap Fancy Fold Card.✨🍂
🌿✨ This design isn’t just beautiful to look at — it’s interactive, layered with rich textures, and full of those little WOW details that make handmade cards so special. From the shimmering plaid backdrop to the hidden magnet closure, every step of making this card is fun and rewarding. It’s the kind of project that feels like a keepsake and will truly delight anyone who receives it. 🍂💌
Where ink meets elegance and every card tells a story.
🎉 Give this one a go, and let your creativity bloom! I'm here to cheer you on and would be honored to be your Stampin’ Up! Demonstrator.
💕 Let’s make something beautiful together! 🖌️💫
When you download the PDF recipe ALL the links will take you to my Stampin UP website sales page. There you can add any of the products used to your cart. Use the back button from the shopping page and it will take your straight back to the PDF to continue using the recipe.
Share this recipe & post
About me

Hi there 👋 My name is Tammy Dawn Tomei. Thanks for being here and checking out my creations.
Signup For My Tutorials, Designs, and Card Recipes Sent To Your Inbox
Receive notifications of new posts, recipes and my latest creations by email.
Get My Favorite Extra's
I recommend all of these products because I own them, use them, and love them.
Raye Craft Organizers
Where creativity blooms and every piece tells a story. Get a Handmade craft organizer by Dedrah Raye Creates
Get the Products You Need
2025 © Tammy Tomei. All Rights Reserved.
Tammy Tomei is an Independent Stampin' Up!® Demonstrator. This blog is owned and managed by Tammy Tomei and DMT Solutions, Inc.. Stampin' Up! does not endorse the use of the contents of classes, tutorials, services, or non-Stampin' Up! products that might be offered here.
As an Amazon Associate, I earn from qualifying purchases.


