Textured Floral Tower Fun Fold
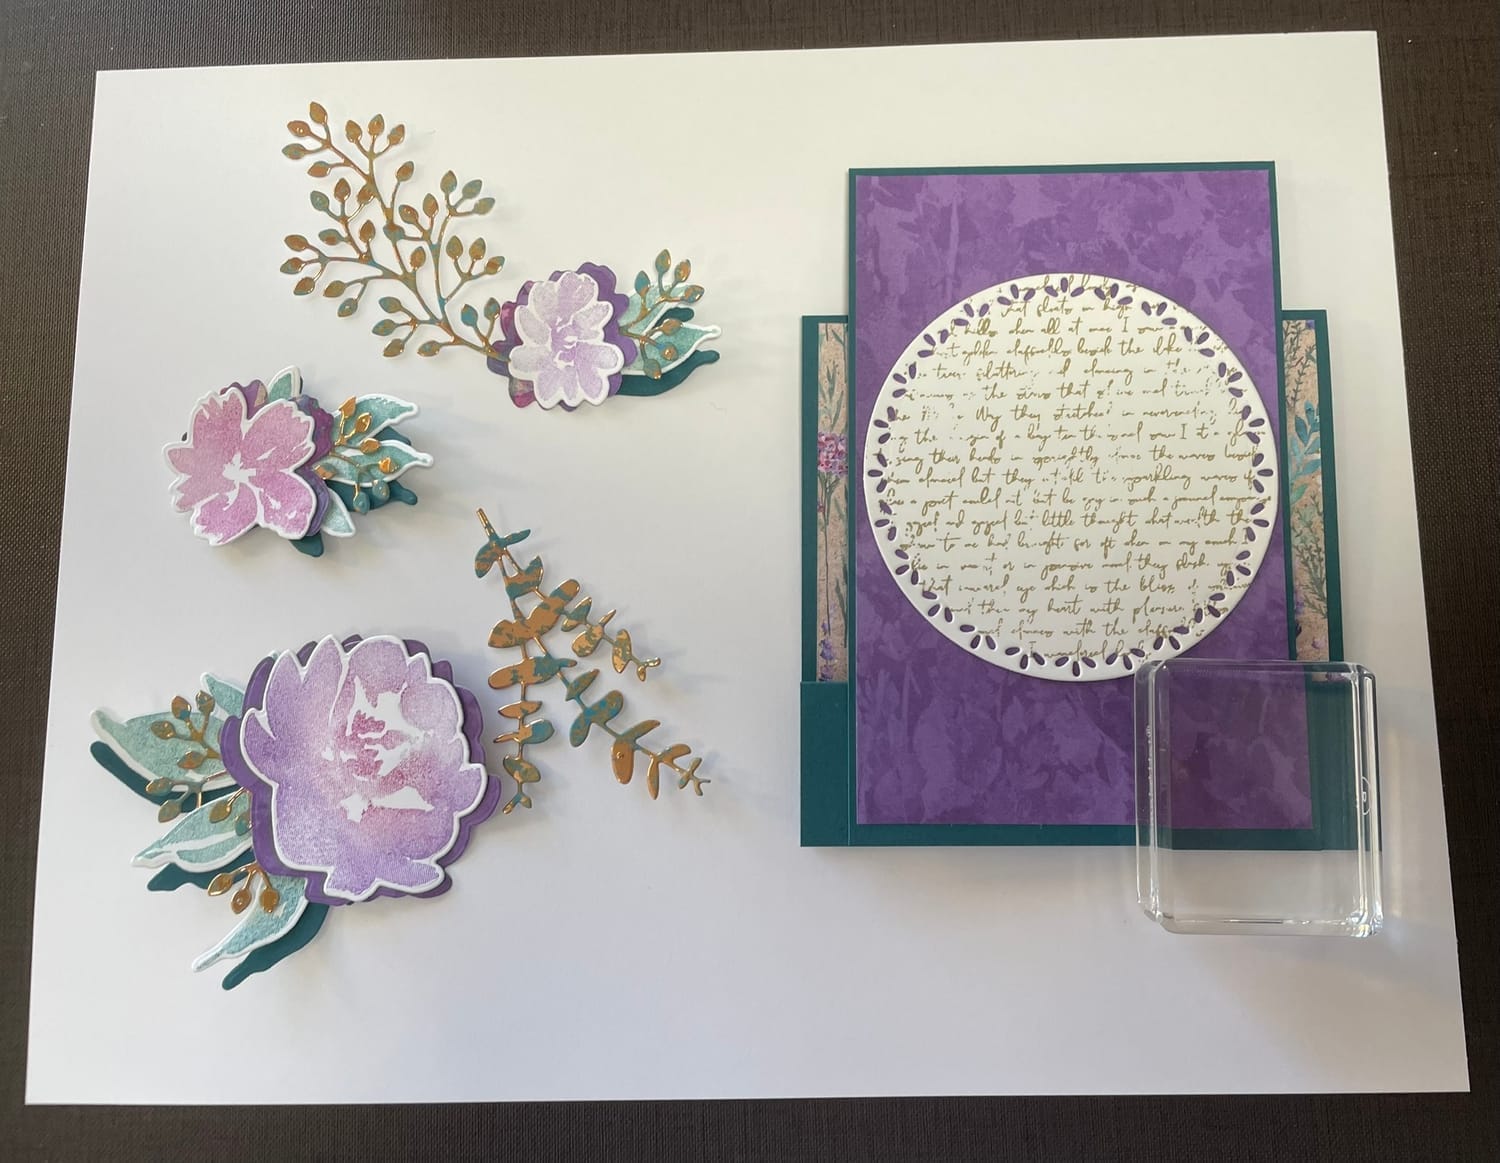
This beautifully crafted tower fun fold card is designed in rich hues of Gorgeous Grape and Berry Burst, creating a striking tower fun fold platform for the dimensional floral arrangement. Textured floral stamps and coordinating dies bring soft, layered blossoms to life in shades of lilac and blush, while oxidized copper accents add an elegant, vintage touch. Delicate foliage peeks through with a metallic sheen, complementing the intricate details. A Pretty Peacock metallic ribbon and brushed brass butterflies add a finishing touch, enhancing the depth and sophistication of this heartfelt creation.
Card Recipe
TEXTURED FLORAL TOWER FUN FOLD RECIPE
STAMPS, CARDSTOCK, DSP, INKS
TEXTURED FLORAL PHOTOPOLYMER STAMP SET
ELEMENTS OF TEXT CLING STAMP SET
PERENNIAL LAVENDER DESIGNER SERIES PAPER
METALLICS WOW EMBOSSING POWDER
OXIDIZED COPPER SPECIALTY DESIGNER SERIES PAPER
CARD BASE
4 ¼ x 11 score @ 1 ¼ ,2 ½, 6 ¾
3 ½ x 11 score @ 5 ½ (Tower)
4 ¼ x 3 ¾ (front focal image) die cut 1 large leaf, 2 medium leaves
CARDSTOCK
3 ½ x 3 ½ (front backdrop) stamp elements of text cut Spotlight on Nature die 3 ¼ round
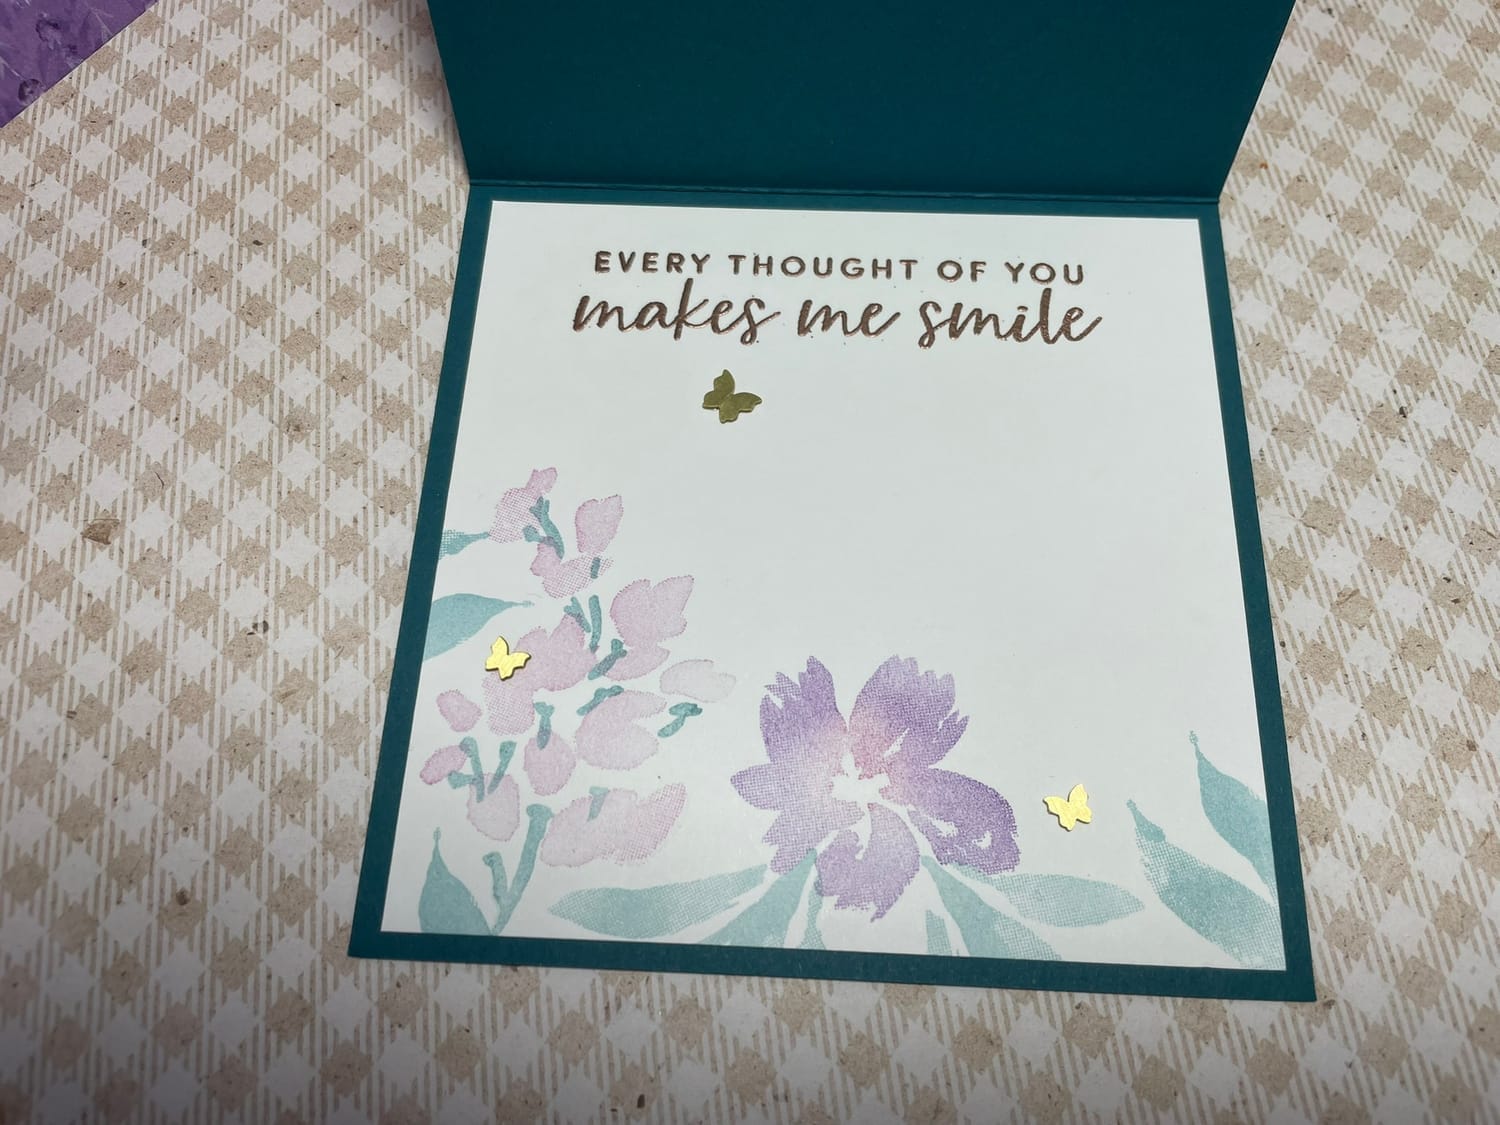
4 x 4 (inside sentiment) stamped and embossed with copper
5 ½ x 6 (front floral and leaves) 1-lg floral, 1- med floral, 1-small floral, 2- med leaves, 1 lg leaf) stamp and die cut out) * ink technique in assembly instructions
DSP
PERENNIAL LAVENDER DESIGNER SERIES PAPER
3 3/8 x 5 ¼ Grape marble side (tower front)
4 x 4 Small floral & leaves side (center panel)
2 ¼ x 6 Grape marbles side (2-Largest floral, 1-small floral, no stamping just die cut out)
2 ½ x 2 ¼ Saturated floral side (1- med floral, 1 small floral, no stamping just die cut out)
OXIDIZED COPPER SPECIALTY DESIGNER SERIES PAPER
2 ½ X 8 Die cut 2-lacy style branches, - 1 straight style branch, 2-floral stamens
INKS
PRETTY PEACOCK CLASSIC STAMPIN PAD
BERRY BURST CLASSIC STAMPIN PAD
GORGEOUS GRAPE CLASSIC STAMPIN PAD
CRUMB CAKE CLASSIC STAMPIN PAD
EMBELISHMENTS
PRETTY PEACOCK & GOLD 3/8" (1 CM) METALLIC RIBBON
ASSEMBLY INSTRUCTIONS
FIRST
Cut card bases, crease score lines w/ bone folder. Glue floral DSP to front of short base & glue grape marbled DSP to front of tall tower base. *Use liquid glue to adhere bases together first press all folded pieces down flat glue tower to front bottom of short base. Flip over and glue the bottom of tower onto the back of the short base. I glued mine to be centered in front of the 4 ¼ wide shorter base.
NEXT / Time for the Stampin fun!
This stamp set is even greater than the two step style. It takes a bit of practice with this type of stamp. (so, use some copy paper to practice) I used a sponge dauber and clear block H to pick up the ink off the ink pad. Now that you’re ready very lightly tap the color onto the stamp. You can view through them being photopolymer. On my largest floral I used berry burst in the center and grape on the edges to make the two-toned look. The medium floral is straight gorgeous grape, and the small floral is straight berry burst. Stamp your basic white with crumb cake elements in text LG round stamp. Stamp basic white inside panel with greeting, stamp floral and leaves images. I used WOW copper embossing powder for inside and front sentiments. (*use coordinating ink if desired)
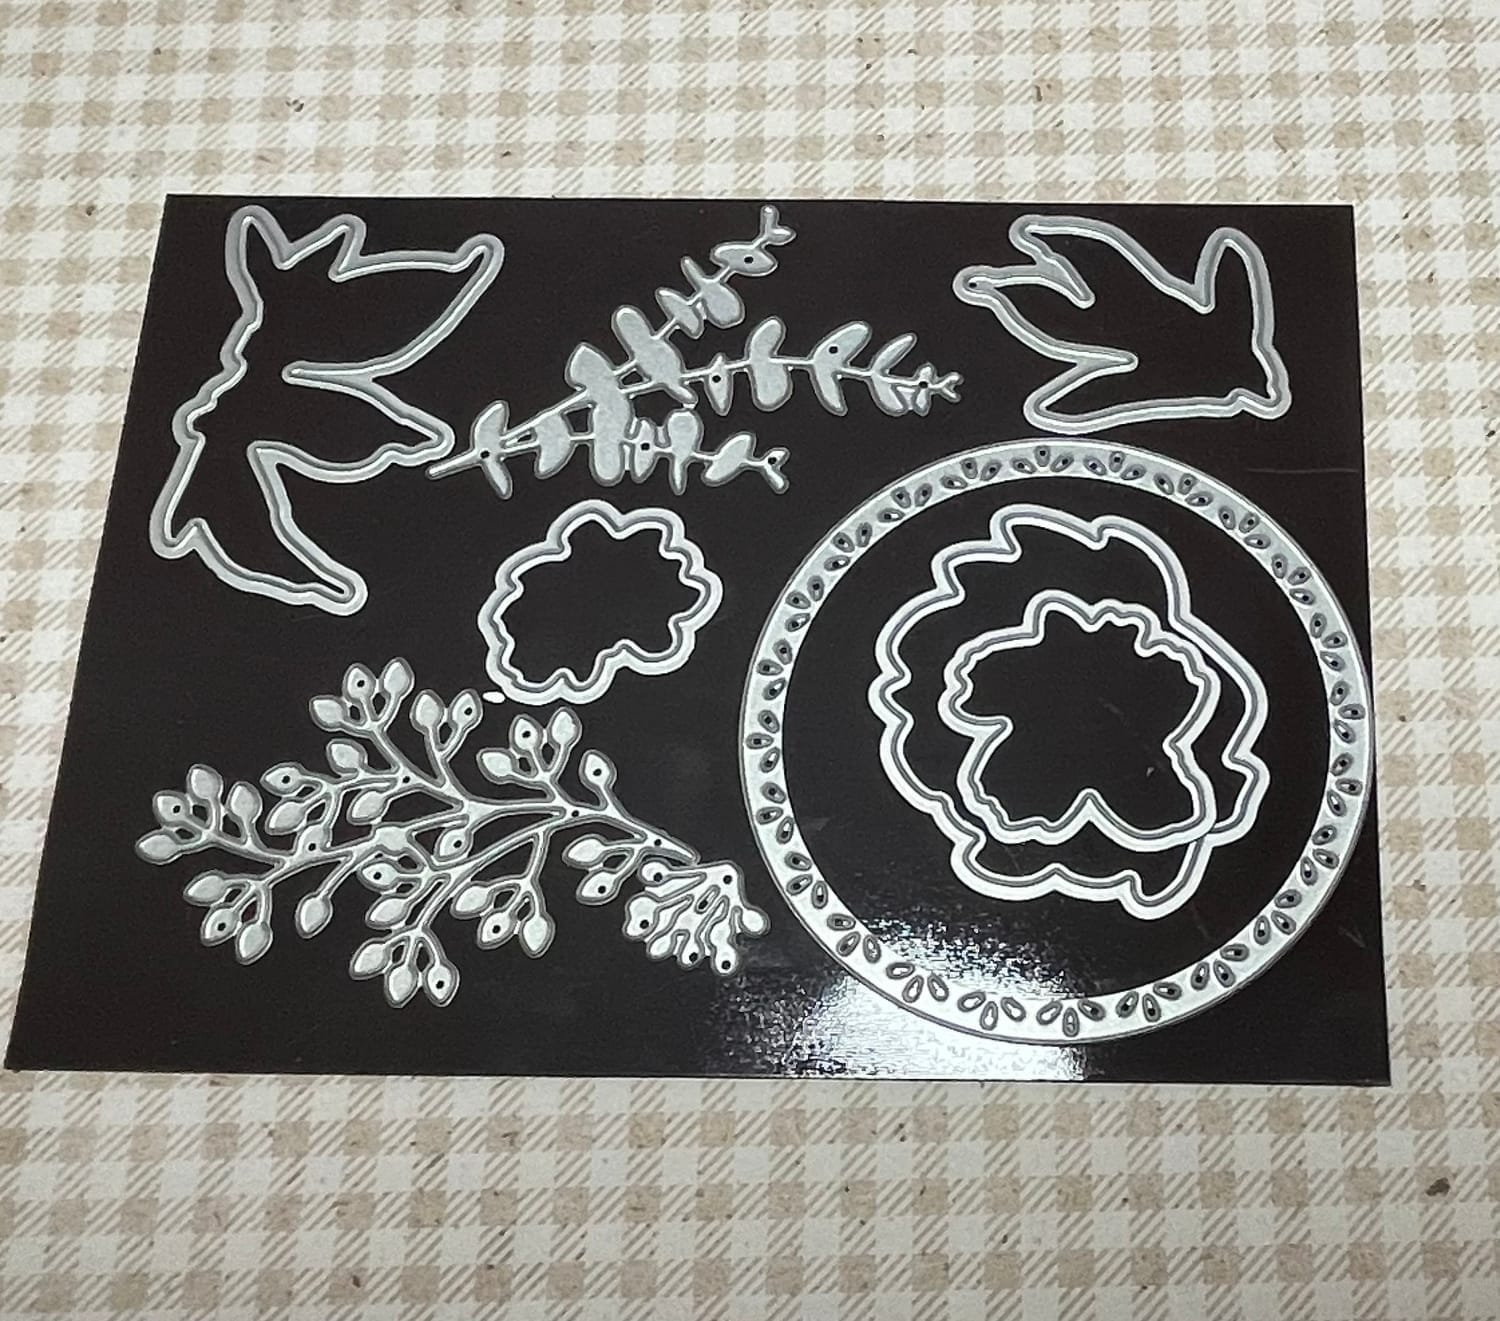
THEN / Die cutting time!
Using the dies and the paper in the recipe cut out ALL the leaves and florals in cardstock and the DSP. Plus, the Spotlight on nature circle die & the Oxidized copper Specialty DSP
NOW / Assembly time
Glue down the basic white circle onto DSP in front of the tower base. Glue 1-Lacy look greenery in Iodized copper to the upper left side of circle at 10-11 o’clock. Glue the other greenery in iodized copper to the lower right at 4-5 o’clock. Both these pieces should overhang the front tower panel. Time to glue the layered florals for extra dimension. Pick up the Lg floral layer underneath the 2- Marbled DSP to show on top and bottom of stamped image. Small floral uses the 1- saturated 1- marbled DSP to show up on the right and left side floral is standing vertically. Lastly the medium floral has a 1- saturated DSP, it is placed under to hang out only at the top of stamped image. Hold each in your hand and glue in desired place with liquid glue, or I used mini glue dots. Now it’s time to layer the leaves. Take the last lacy greenery iodized pc and cut it into 4 pcs, Lg floral gets 2- pcs. Now take the pretty peacock CS place the dies cut image on top then a piece of greenery. In hand hold over the card tower and place to see how short you want your the leaves to be. Adjust and glue under florals. The florals are placed in a cluster in the center to expose the text elements stamping underneath. Turn over ALL florals with leaves attached and place your dimensionals on the back. See tutorial pictures. Remove backings and place LG floral with leaves downward & overhang at 6-8 o’clock, medium floral placed under Lg floral at 12-1 o’clock with leaves up and onto grape marble DSP. Small floral vertical on top both florals placed at 3 o’clock with leaves overhang. This will give you a dimensional and overlapping look. Cut iodized copper stamens into pcs and glue as desired.
EMBELISHMENTS
Pretty peacock & gold metallic ribbon @ 13” tie around bottom front around both bases. I used a knot technique and adhered the brass butterflies.
A few elegant finishing touchs for such a beautiful floral card!
Tutorial
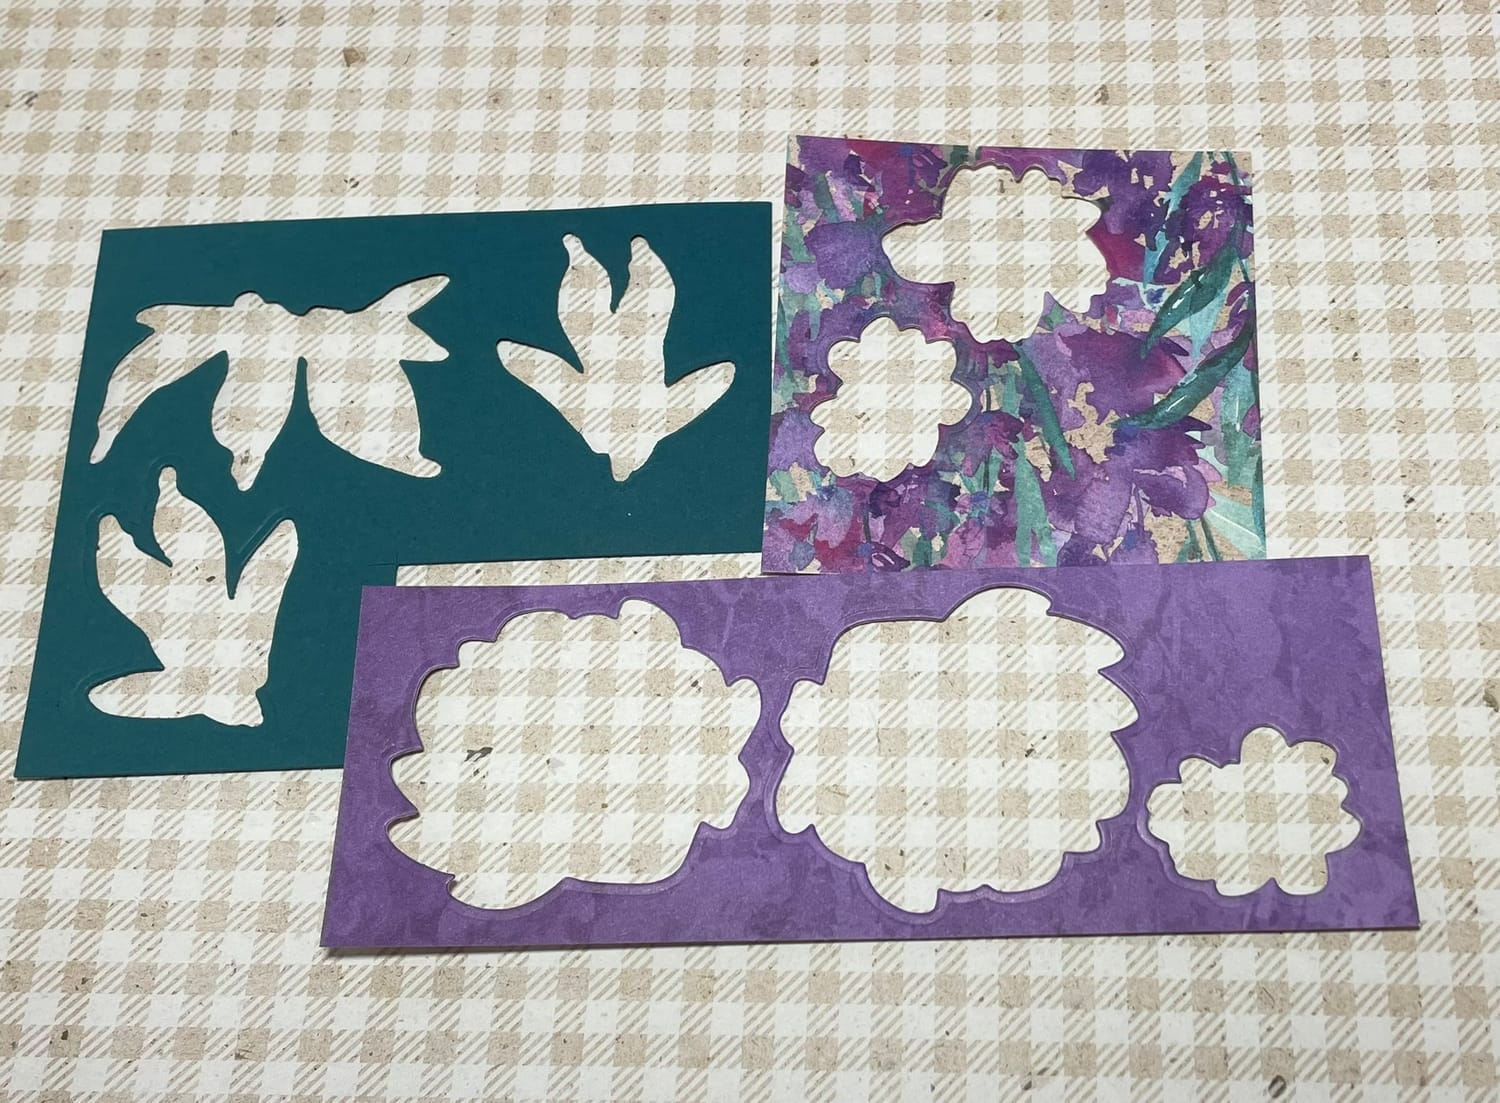
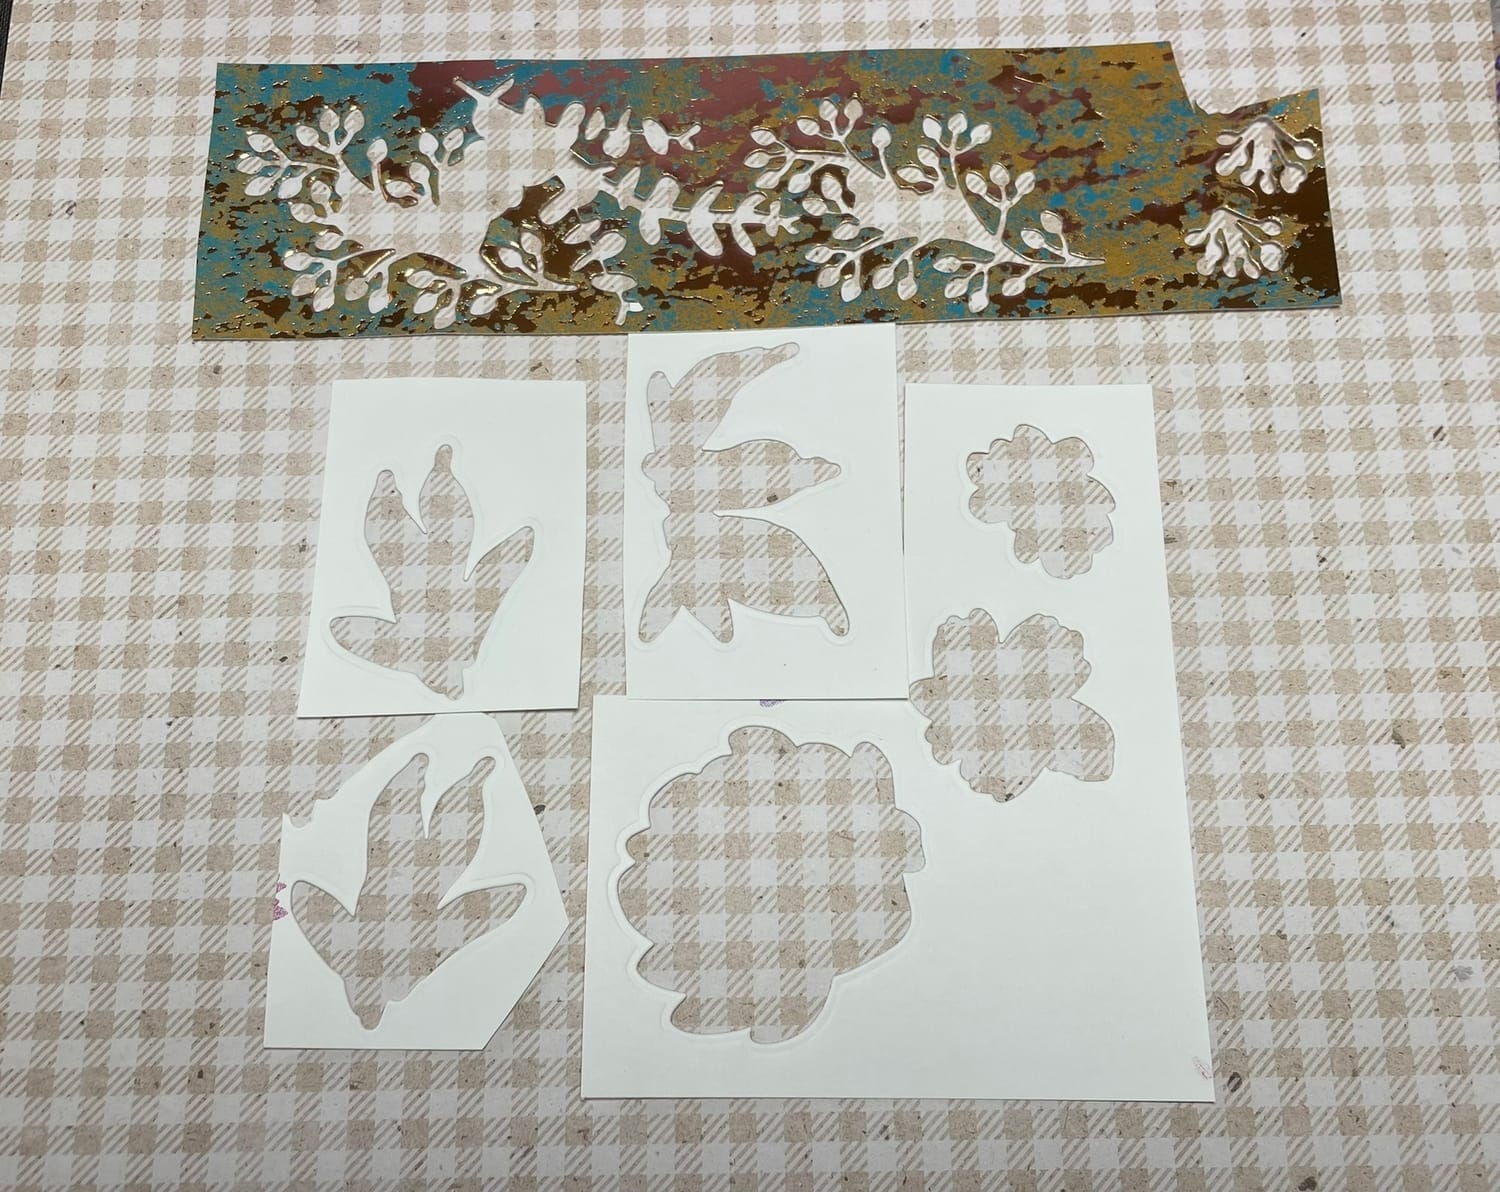
Die cut out ALL the florals & leaves with the cardstock and DSP & Specialty Designer Series papers. I used Pretty Peacock for the card base and its simply beautiful with the oxidized copper with pretty peacock running through
It doesn't have to be Christmas to use Specialty paper. Find a way with the metallic paper you own and create a spring card.
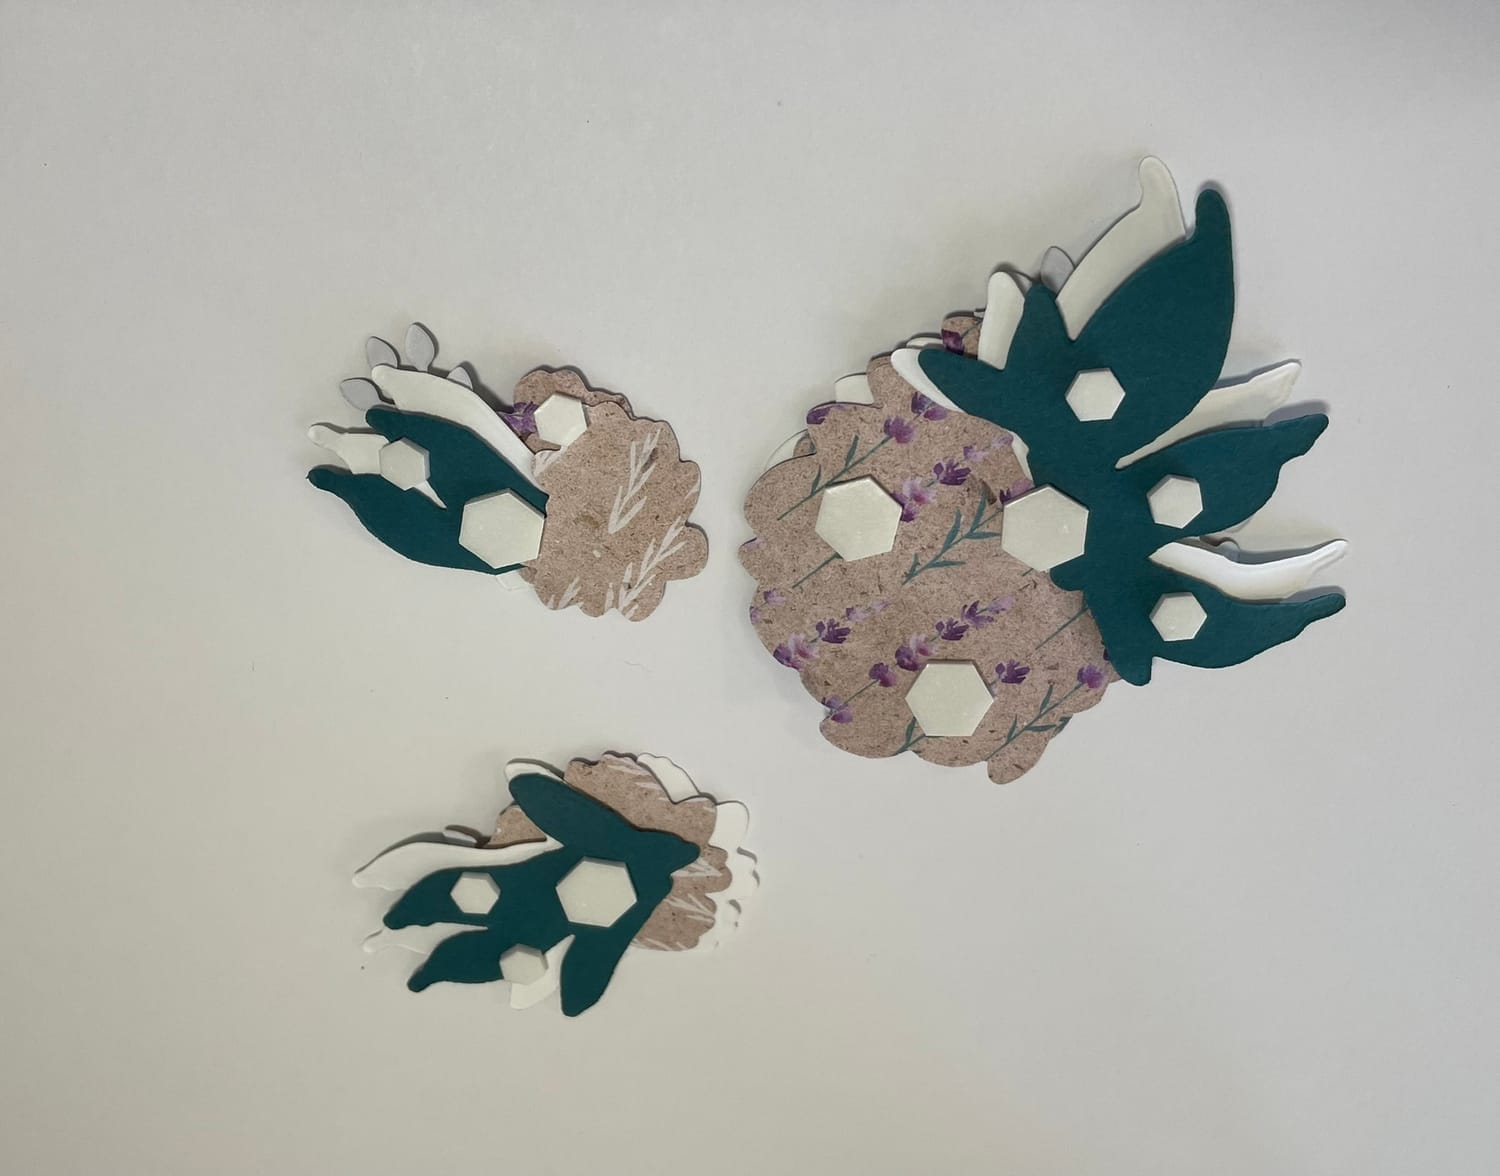
The pictures above shows all three florals with leaves, Front & Back
Now one by one glue each ozidixed copper greenery full branch onto elements of texture stamped spotlight on nature circle backdrop. Starting with the Largest floral take dimentionals backings off and place bottom Left, next tuck under medium floral under largest floral. Lastly attach smallest floral ontop both florals as the finishing top layer. Use recipe directions above for specific placement
I heat embossed my sentiments with WOW copper powder to match the oxidized copper specialty designer series paper!
Use what you have, stamp in your favorite matching ink color.
Happy Stamping! Making cards is super fun and easy with the right tools and a little creativity.
When you download the PDF recipe ALL the links will take you to my Stampin UP website sales page. There you can add any of the products used to your cart. Use the back button from the shopping page and it will take your straight back to the PDF to continue using the recipe.
Thank you, my wonderful new Stampin’ friends, for supporting me and my passion for paper crafting by choosing to purchase from me. I’m truly honored to be your Stampin’ Up! Demonstrator and look forward to sharing creativity with you! 💜

Share this recipe & post
About me

Hi there 👋 My name is Tammy Dawn Tomei. Thanks for being here and checking out my creations.
Signup For My Tutorials, Designs, and Card Recipes Sent To Your Inbox
Receive notifications of new posts, recipes and my latest creations by email.
Get My Favorite Extra's
I recommend all of these products because I own them, use them, and love them.
Raye Craft Organizers
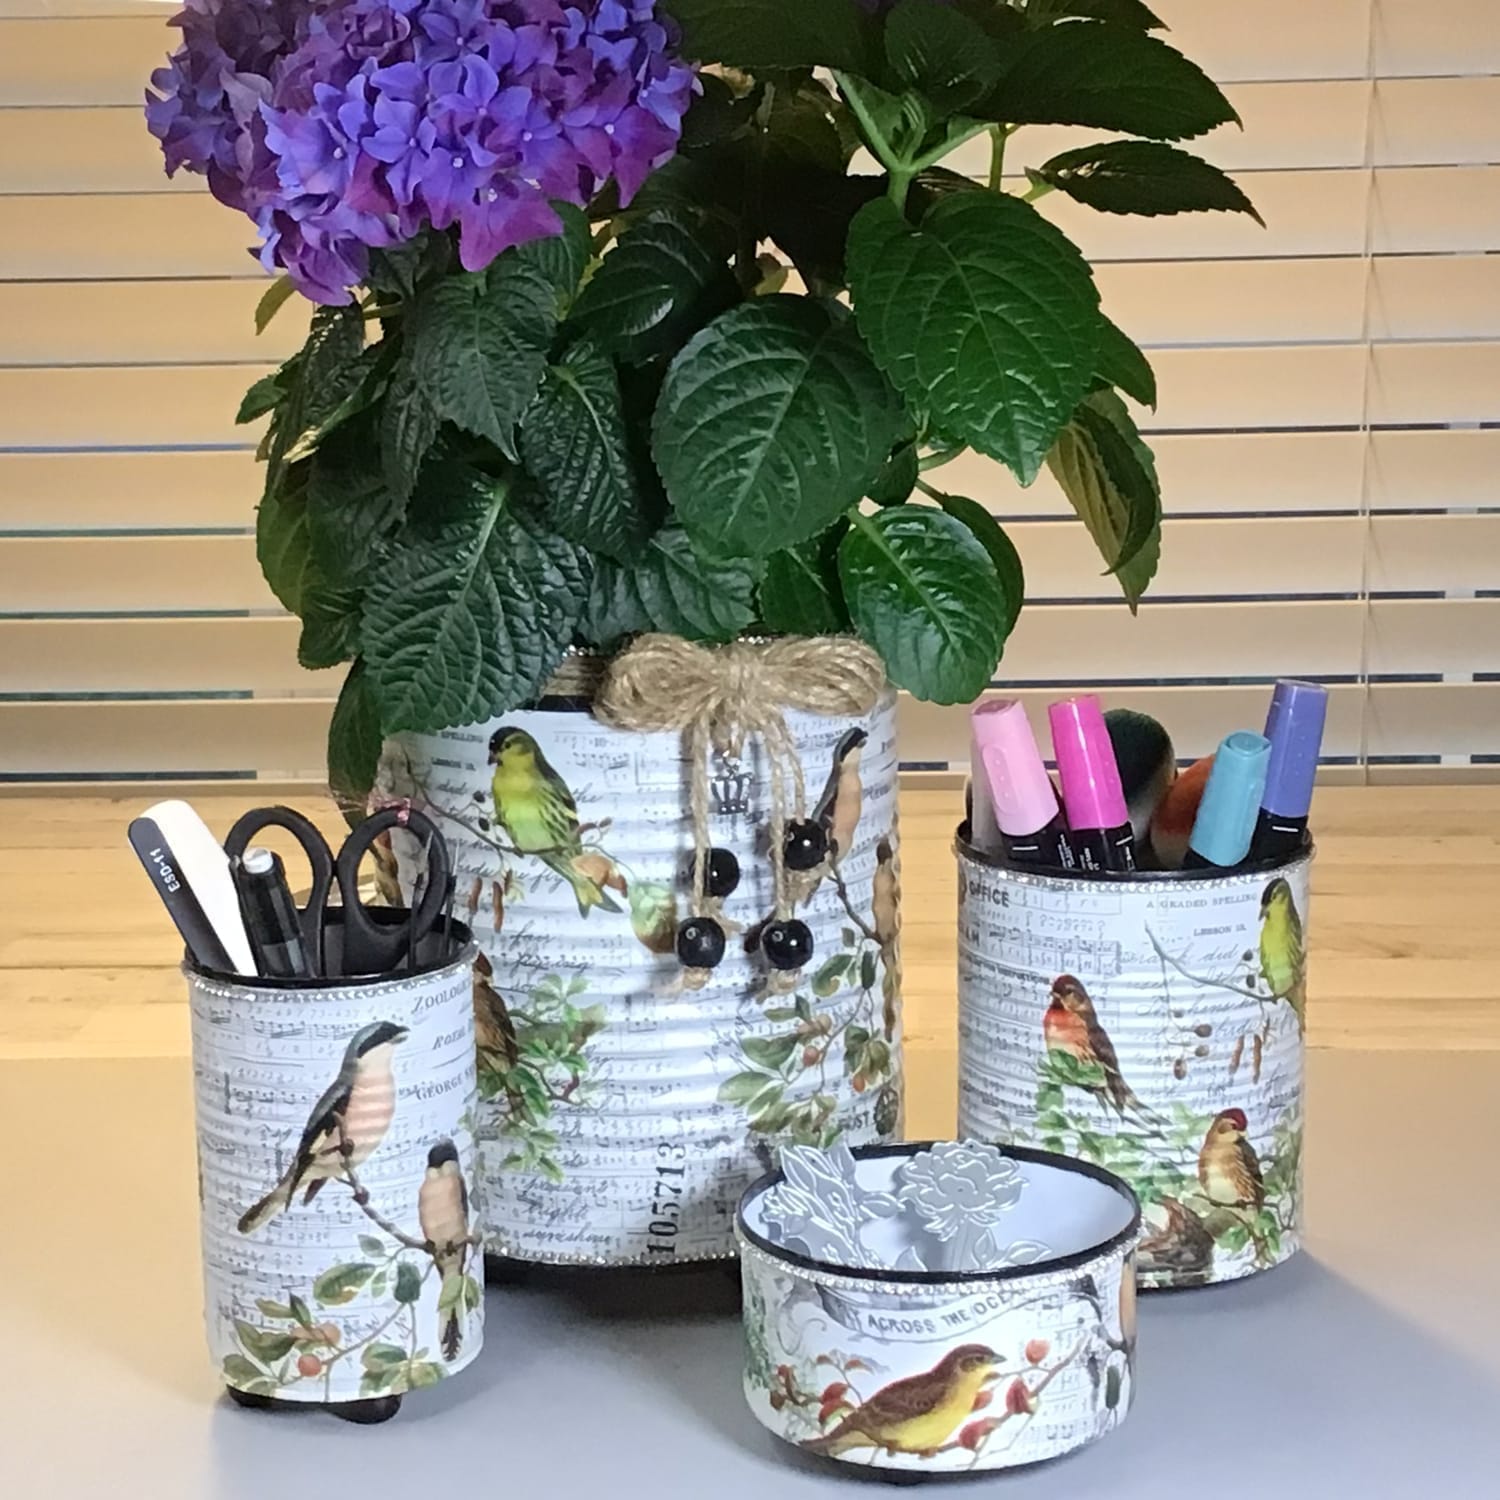
Where creativity blooms and every piece tells a story. Get a Handmade craft organizer by Dedrah Raye Creates
Get the Products You Need

2025 © Tammy Tomei. All Rights Reserved.
Tammy Tomei is an Independent Stampin' Up!® Demonstrator. This blog is owned and managed by Tammy Tomei and DMT Solutions, Inc.. Stampin' Up! does not endorse the use of the contents of classes, tutorials, services, or non-Stampin' Up! products that might be offered here.
As an Amazon Associate, I earn from qualifying purchases.


